
DIY Paris Themed Stationery Made with Iron-on and an EasyPress 2
POST DISCLAIMER: This is a sponsored conversation written by me on behalf of Cricut. The opinions and text are all mine.
READER COMMENT DISCLAIMER : Comments submitted may be displayed on other websites owned by the sponsoring brand.
 Did you know that with Iron-on and an EasyPress 2 you can make your own Paris Themed Stationery?
 Did you know that with Iron-on and an EasyPress 2 you can make your own Paris Themed Stationery?
I adore Iron-on. When I first started using Iron-on had a blast making custom baby onesies ( check them out here) and custom shirts for my family (this one is my favorite). However, my real love affair with Iron-on came when I discovered that I could use Iron-on n more materials than just fabric. I particularly love using Iron-on with my paper crafting. Unlike vinyl which ends up looking like a sticker on paper and cardstock, iron-on melds with the base material giving it a professional embossed look. My latest project with Iron-on was making this fun Paris themed Stationary using 2 kinds of Cricut Iron-on and an EasyPress 2.

I love the idea of making my own custom stationery. It reminds me of those olden days when handwritten letters and cards were more common and fine ladies had their own personalized station that they used. Eventually, I want to use my graphic design skills to create my own seal to not only make into an official wax stamp to seal letters but also to put on all my stationary like ladies used to do. In the meantime, I thought it would be fun to design this Paris themed stationery set for my daughter turning 9 next month.
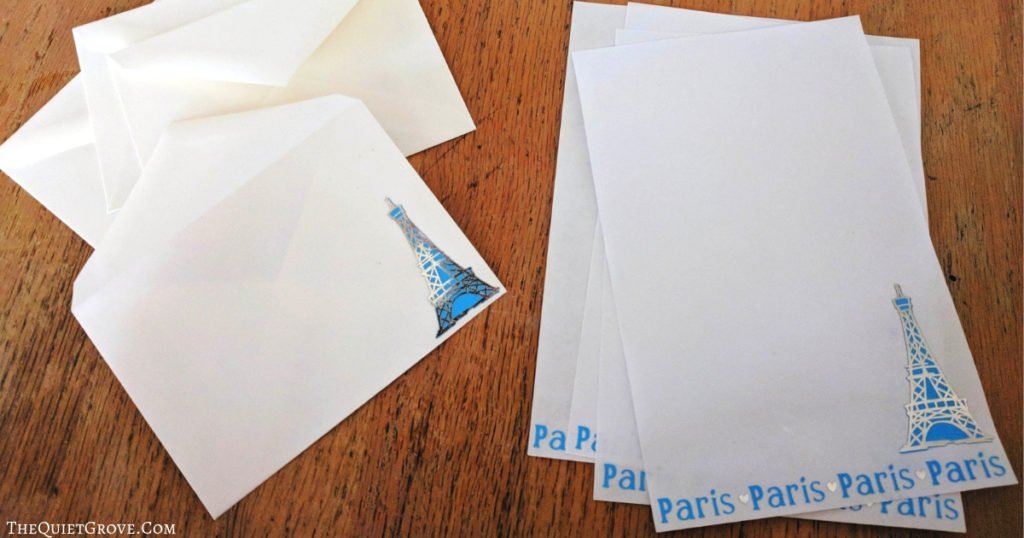
I decided to make both paper stationary as well as cards to go with some old envelopes I had. Once I decided on what I wanted to make and finished the design in design space the next thing I needed to decide on which kinds of Iron-on I wanted to use. Each Iron-on has a different look when applied to paper and cardstock. Cricut has really worked on creating some amazing Iron-on materials over the last few years. Not only are they constantly looking on new types of Iron-on to add to what they offer, but they are also always working on improving the quality of the Iron-on they offer. Did you know that select Iron-on materials offer a strong bond guarantee? What's that you ask? Well as I mentioned in my recent post about everything you need to know about the EasyPress 2, Cricut is soo confident about the quality of their Iron-on that when you use a Strongbond iron-on material as directed, then you will be satisfied with the results. If not Cricut will replace it for free. How cool is that!
So what kinds of Iron-on does Cricut offer? Every time I look it seems they are coming out with something new, Right now They offer Everyday, Lite, Foil, Holographic Sparkle, Glitter, Patterned, SportFlex (made for sportswear), as well as cool preprinted and cut Designs. After looking through all the various kinds of Iron-on I decided that for this project to use both everyday Iron-on as well as Foil Iron-on. That way the design image would really POP!
Materials Needed:
- Cricut Maker (or other Cricut Cutting Machines that work with Design Space)
- Cricut Design Space canvases for Paper Stationery, Cards, and Envelope decoration.
- 12 x12 Standard Grip Mat
- 12x12 Light Grip Mat
- Fine Point Blade
- Scoring Wheel (or Score tool found in Essential Toop Kit)
- Cricut Essentials Tool Kit
- Blue Everyday Iron-on
- Silver Foil Iron-on
- 6x7 EasyPress 2
- Small EasyPress Mat
The Instructions are the same for all the Iron-on work. For the stationery, you will need to cut the paper to size from regular copy paper and for the card, you will need to cut the cards from cardstock and use the scoring wheel to score where you want to fold the card for that crisp fold line.

The most important thing is to make sure you select the right material before cutting each mat (ie paper, cardstock, Iron-on and Foil Iron-on). Also, you will need to remember to click on the mirror image button for the mats cutting iron-on. This is especially important for the designs that have words in them.
p.s the sizing of everything is based on 3.5x5 in envelopes so you will need to adjust the sizing if your envelopes are a different size.
Iron-on Instruction:
- Open Desired Design Space Canvas for Cards, Stationery Paper or Envelope Decoration.
- Click Mirror Image for the Iron-on mats
- Select correct material (Iron-on for the blue mat & Foil Iron-on for the grey mat.)
- Place Iron-on shiny side down toward the mat.
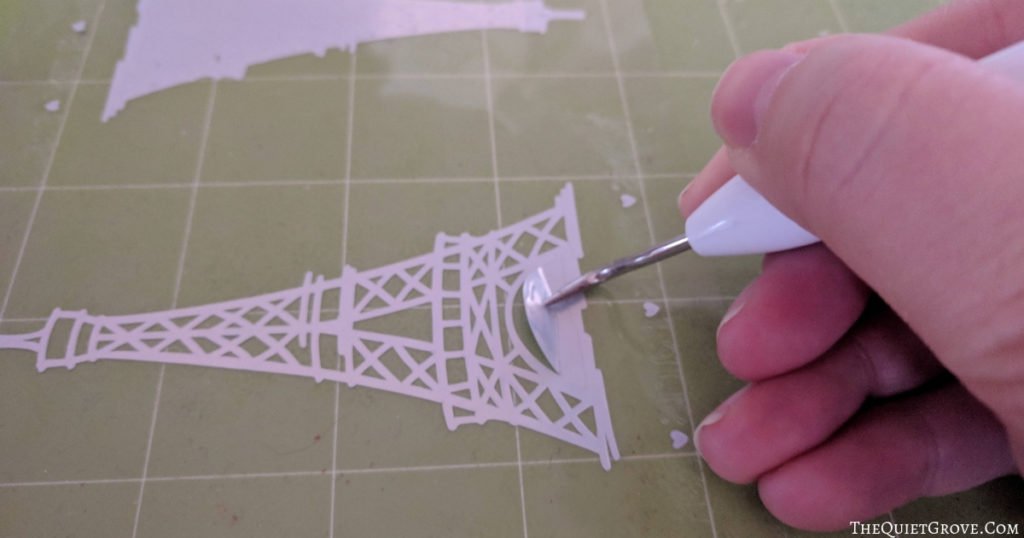
- After cutting, use weeding tool and tweezers to weed the design. (you can also use tape for those really small pieces but be careful that you don't tear your design)
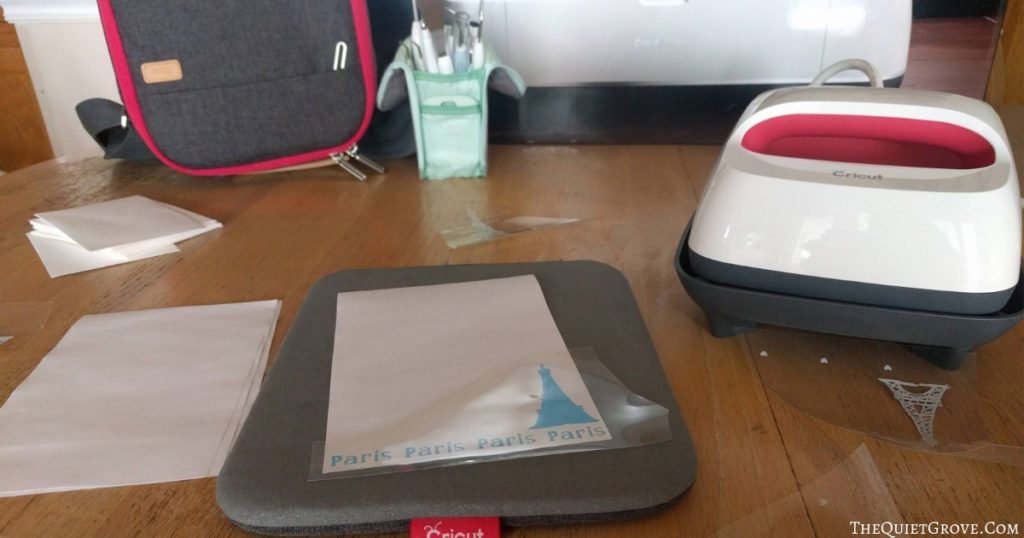
- Heat the Easypress 2 to 280 (for the blue Everyday Iron-on) and set time for 30 seconds.
- Place the Cut Iron-on design on paper, card or envelope, then press with the Easypress 2 (using the Easypress mat underneath) with firm pressure for 30 seconds.
- Then peel off the protective backing off the Iron-on
- Next, change Easypress 2 Heat setting to 270 (for the foil Iron-on)
- Place the top design over the base design lining up the Eiffel tower design and press with the Easy Press 2 (using the Easypress mat underneath) with firm pressure for 30 seconds.
- peel off the protective backing off the Iron-on (Cricut recommends letting it cool first for a “cold peel”)

Yep using Iron-on is that simple. The longest part of the whole process is the weeding (especially for an intricate design like the Eiffel tower.) Thankfully I find weeding relaxing.
If you decide to use different Iron-on's for this project you can check to see what heat setting you need for your Easypress 2 -->HERE<--
I adore how this stationary set turned out and when my daughter saw it she was over the moon with excitement. The foil Iron-on really contrasted well with the light blue everyday iron on for that soft whimsical embossed look that I was hoping for.
If you liked this post then check out these: (Click on the photo to go to the post)

This is a sponsored conversation written by me on behalf of Cricut. The opinions and text are all mine.


