How To Customize & Label your Kid's Back to School Lunchboxes With Your Cricut
This is a sponsored conversation written by me on behalf of Cricut. The opinions and text are all mine.

Did you know that it's super easy to customize and label your kid's Back to School lunchboxes with a Cricut Maker?

Yep, it's that time of year again where moms everywhere are getting ready for their kids to go back to school. The first part of back to school prep is lots and lots of shopping. Shopping for clothes, accessories, and lots of required school supplies. Next, comes the sometimes tedious task of labeling everything. Why labeling? Because, there are only so many stores in your area, so unless you order everything online odds are your kid will have supplies, (including backpacks & lunchboxes) that look identical to other kids in their class. Last year I showed how to easily make labels for all your kid's school supplies (see post here) as is actually required now in many schools. Today, I want to show you how easy it is to customize and label your kid's Back to School lunchboxes.

Ok soo, some of you are wondering why I even need lunchboxes for my kids when I homeschool. The truth is I do a lot of the same back to school prep as my friends whose kids are in public, private & charter school. But why lunchboxes? Well, the best part of homeschooling is we aren't limited to staying home. We go on lots of field trips, we have get-together's with other homeschool families (and if you know my family...we travel a lot.) having lunchboxes to keep my kid's lunches fresh while out and about comes in handy. Why label? for the same reason my friend's label their kid's lunchboxes... to keep them from getting mixed up with someone else's.

When I went to the store to pick out my kid's lunchboxes I wanted to get fun ones but also didn't want to spend a fortune. I quickly saw that most of the cool themed lunchboxes were pretty pricy and that was just for the insulated lunchbox itself. If I got one of them I would have to spend even more money to get some plastic containers for inside to keep their food fresh and un-squished. Then at Walmart, I found these more simple insulated lunch boxes that cost less than the themed lunchboxes and came with a water bottle, sandwich container, and an ice pack. Even with adding in 2 packages of smaller plastic containers (for fruits and snacks.) **If these lunchboxes are out at walmart you can get them on Amazon as well.

Of course, the designs were plain My daughter picked out one with some cute owls on it and there were only the black and grey camo ones for my two boys. I wasn't worried about this since I knew that I had some Premium Permanent Vinyl at home that I could use my Cricut Maker to add some quick and easy custom decorations as well as labels.

For the front of my daughter's lunchbox we through it would be fun to put "Whoo's Ready For Lunch" and then next to her name on the back of the lunchbox and all the inside containers I asked if she wanted me to put little owls since Cricut Access has some really cute ones, but she requested little Foxes (which is her favorite) animal instead. Thankfully I found a cute one in Cricut Access that would shrink really well for the smaller labels. And so her lunchbox turned out to be a fun Owl & Fox theme.

I knew my boys love video games, so for my oldest, I designed a Minecraft creeper design. On the front of his box, I put the classic Minecraft creeper with the message "Lunch Time, Nom, Nom Nom" Then on the back next to his name and on the inside container labels I also put the little creeper design. The green, black, and yellow vinyl designs really transformed the simple black & grey camo lunchbox. My son absolutely loved it!

For my youngest's lunchbox, I went more subtle Mario themed. In Cricut Access, I found a Mario like a star in a design that I edited for my use and teamed with a read LUNCH for the front of his lunchbox. Then I included the star next to his name on the back of the lunchbox and in the labels on the inside containers. Again, the yellow, red & black vinyl designs popped against the grey/black camo transforming his lunchbox. My son adores it.

For those who would like to do the same for their kid's lunchboxes, I am including the step by step tutorial along with the design space canvases which you can edit to add your kid's names.

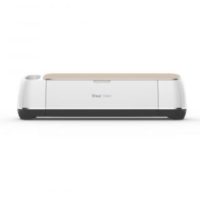
I used Cricut's Premium Permenant Vinyl for this project because I wanted the decorations and labels to stay on their lunchboxes and containers throughout the year. I didn't use Iron-on because I didn't want to risk damanaging the inside insulation of the lunchbox. I love using Cricut brand vinyl because it comes with a strongbond guarrentee so I know I am working with quality materials to get the results I want.
Tutorial for how to Customize your Kid's Lunchboxes with your Cricut

This tutorial is for how to use Cricut Permanent Vinyl and your Cricut Maker to customize your kid's school lunchboxes and Lunch Containers. It contains links to the Cricut Design Space Canvas for 3 different Lunch Box designs.
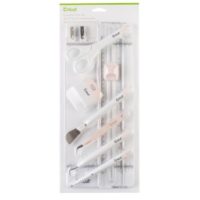
Materials
Instructions
Open the Cricut Design Space Canvas for the desired Lunchbox
Owl/fox canvas HERE

Minecraft canvas HERE

Mario Star Canvas HERE

Edit name on the canvas to your child's name and click to Make it.

Set the material to Premium Outdoor Vinyl (that's the setting for permanent vinyl)
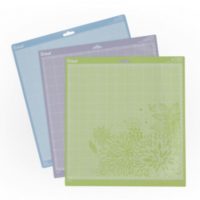
Place vinyl on standard grip mat and start cutting.

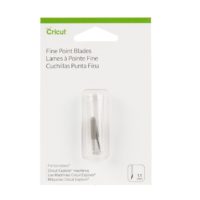
After cutting use your weeding tool from your Essential Tool Kit to weed out unneeded cut vinyl.

--> REPEAT for all Mats <--
Cut a piece of transfer tape to the size of your cut design.

Peel-off back 0f transfer tape and place over weeded vinyl design.
Use scraping tool from the essential tool kit to firmly adhere the transfer tape to the vinyl design.
Peel vinyl backing off.

Place vinyl design where you want it on the Lunchbox or inside containers and use the scraping tool again to firmly attach the vinyl to surface.
Carefully peel off the transfer tape.

--> REPEATE for all three Lunchboxes <--
Notes
- Due to the soft fabric like nature of the lunchbox make sure to place your hand firmly on the inside of the lunchbox for stability when attaching the vinal decoration & labels.
- Also, you want to peel the transfer tape off carefully from the lunchbox. the vinyl may try to lift a bit but if you are careful it will stay down and then once the glue on the permanent vinyl sets it won't come off.
Recommended Products
As an Amazon Associate and member of other affiliate programs, I earn from qualifying purchases.


I also chose the permenant vinyl for the inside containers because it makes it so I can wash them and the vinyl won't come off (you just need to hand wash!)

If you liked this post, then make sure to check out these: (click on the photos to go to the posts)


POST DISCLAIMER: This is a sponsored conversation written by me on behalf of Cricut. The opinions and text are all mine.
READER COMMENT DISCLAIMER: Comments submitted may be displayed on other websites owned by the sponsoring brand.