
How To Make Custom Christmas Cards With Cricut Iron-On


Have you ever wanted to make your own Custom Christmas Cards?

One of my favorite things about the Cricut Crafting machines is how easy it is to customize things especially with Iron-on which is one of my favorite materials to work with. This week I am joining together with some of my favorite Cricut bloggers for a Cricut Holiday event to show you how to use Iron-on for a custom Christmas experience (make sure you check out the fun projects made by my blogging friends which I will have linked at the bottom of this post.) For my project, I want to talk about making your own custom Christmas Cards using Cricut Iron-On & the new 6x7inch EasyPress 2.

Did you know you can use Iron-on on paper and cardstock? Not only is it possible, but the results are stunning! As you can see by these fun Custom Christmas Cards when you use Iron-on on paper products the results are an almost embossed look. Of course, you can make your cards and envelopes using your Cricut but for this project, I used a black card set I had in my supplies. You can get blank cards & Envelopes sets really Cheap on Amazon --> HERE <--

Materials Needed:
- Cricut Maker
- Cricut Design Space For Christmas Cards. –> HERE <–
- Standard Grip Mats
- Fine Point Blade
- Cricut Essentials Tool Kit
- Silver Glitter Iron-on
- Green Glitter Iron-on
- Black Iron-on
- Red Iron-on
- EasyPress 2
- EasyPress Mat
- 5x7 Blank Cards & Envelopes
Instructions:
- Open Design Space Canvas for the Christmas Cards --> Here <-- **To change the name out in this design you will need to detach, edit the name and reattach so that the Cricut knows to cut it out in the format it shows in Design Space.
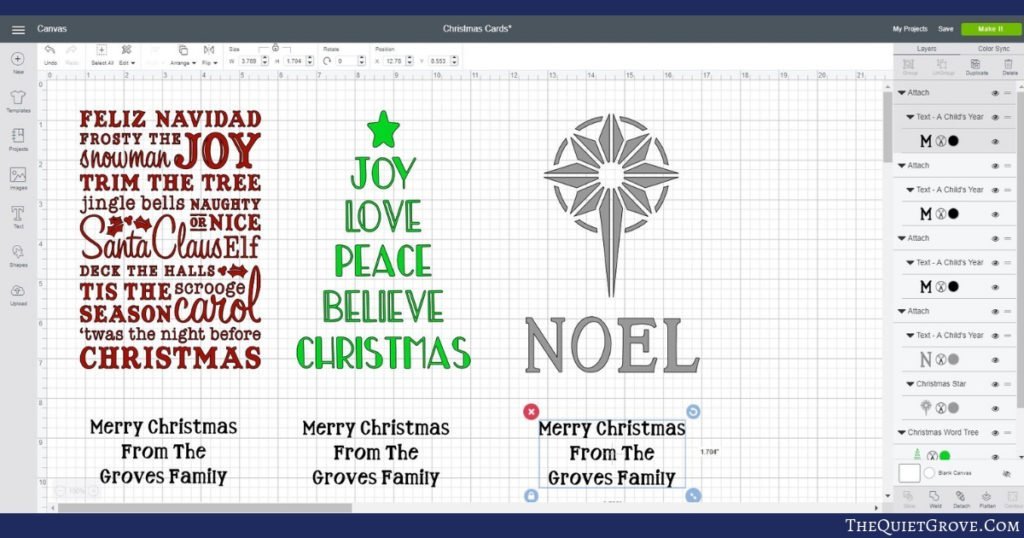
- Click to make them and make sure you select to mirror the Image.

- Make sure you select the correct material before cutting **They have a specific setting for both Iron--on and Glitter Iron-on so make sure you change the material to match what you are cutting.

- Place your Iron-on on your mat Shiny side down.

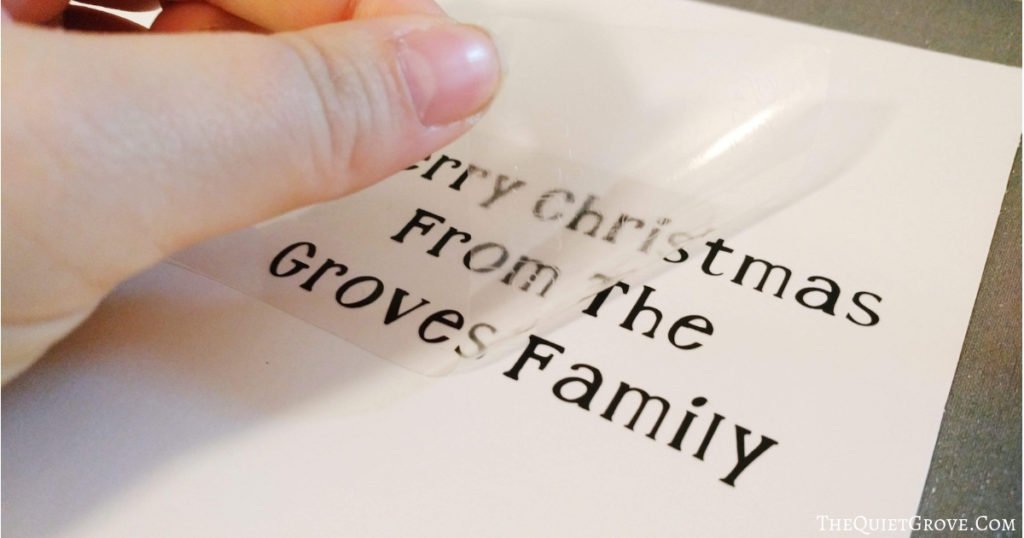
- After you cut your design, carefully weed the unneeded iron-on using your weeding tool from your essential toolkit.

- Heat up your EasyPress 2 and place on the Cardstock to preheat before carefully placing your Iron-on design onto the card.
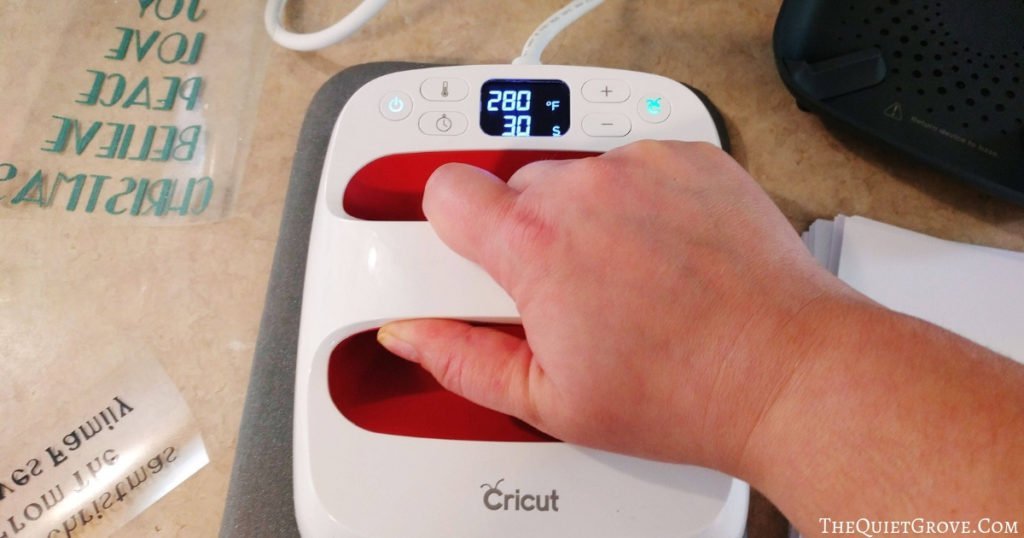
- Use the EasyPress 2 to press the Iron-on onto the Card.
EasyPress 2 Heat Settings (when using the Mat) **If not using the mat or using a different type of Iron-on use this guide for heat settings. --> HERE <--
Iron-On Lite Heat Settings and Instructions:
- Set heat to 280
- Preheat project for 5 seconds
- Press for 30 Seconds with gentle pressure
- Flip Material and Press for 15 seconds
- Peel off warm

Glitter Iron-on Heat Settings:
- Set heat to 290
- Preheat project for 5 seconds
- Press for 30 Seconds with gentle pressure
- Flip Material and Press for 15 seconds
- Peel off warm
Seriously this project takes only a few minutes (the longest part is the cutting and weeding but depending on what design you use it could go faster.) And the end result is just stunning and looks like you ordered them professionally made.

I hope you loved this tutorial for using Iron-on to make your own custom Christmas cards. Make sure to check out the other awesome Christmas projects using Iron-on.
If you Liked this Christmas Post then Check out these others on my site. (Click on the photo to go to the post.)





So pretty! Thanks for sharing!
I just tried the link for the files and it says they are private files. I am very new to Cricut so am I doing something wrong?
Sorry. The link was public but unfortunately when Cricut moved their Design Space from cloud to desktop some of the links to canvases got broken. I have been working on updating them with new links but I have a lot of DIY projects here.
I have updated the link in the post but here is the new link as well. https://design.cricut.com/landing/project-detail/5ee3e74e6d4d220e8c292528
Thank you so much!