
DIY Custom Workout Top with Cricut SportFlex Iron On

POST DISCLAIMER: This is a sponsored conversation written by me on behalf of Cricut. The opinions and text are all mine.
READER COMMENT DISCLAIMER: Comments submitted may be displayed on other websites owned by the sponsoring brand.

Cricut's new SportFlex Iron On™ is perfect for customizing your Work out clothes!
Since getting my Cricut I become obsessed with creating custom shirts and clothes. This obsession has only grown with all the new types of Iron-on Cricut keeps producing. Their newest SportFlex Iron On™ (that features their StrongBond™ Guarantee* for long-lasting results) is a thinner stretchable Iron-on that makes it perfect to use with those more stretchy fabrics like your favorite activewear! In fact, SportFlex Iron On™ is specifically made for tech fabrics like Nylon and Polyester.

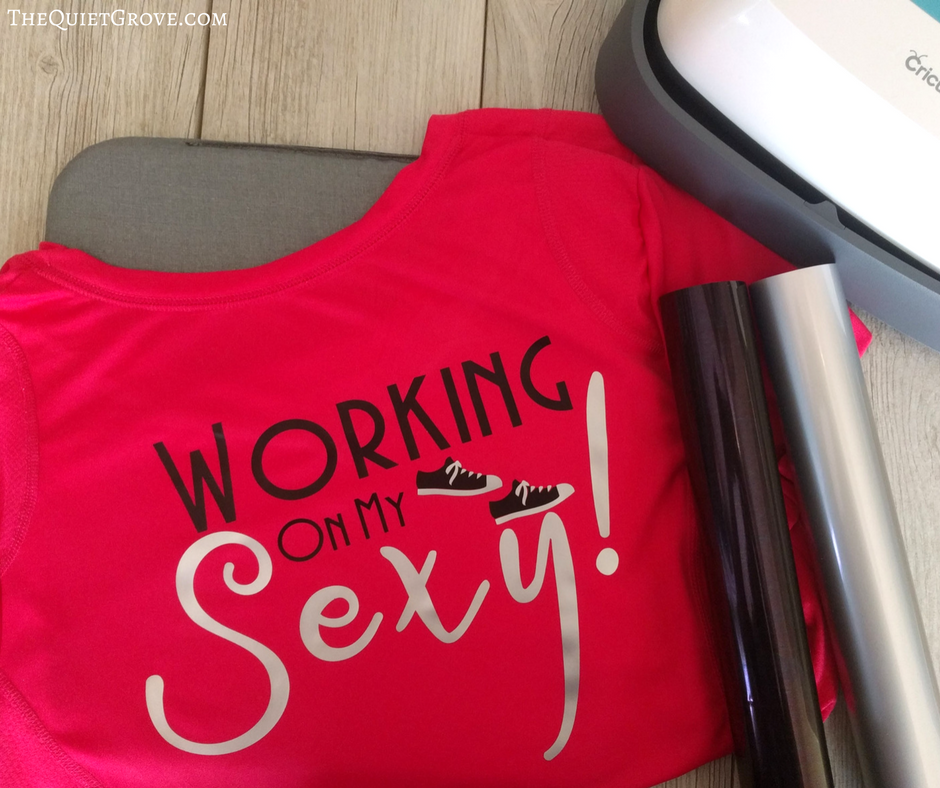
As soon as I heard about it I knew that I had to try it out and customize my new workout top. I wanted a design that spoke about why I work out. As much as my extra weight bothers me, losing weight isn't my main motivation. Oh, I know that losing weight will be a result of working out and getting in shape. And it is something I really want. However, what really motivates me is that when I work out and eat right I FEEL healthier, happier and well sexier right now despite my imperfect body. Even more, when I regularly work out, I find that I have more strength, energy, and stamina to keep up with my crazy active kids.
After thinking about what I wanted to put on my new workout top I decided to put a fun "Working on my SEXY" message on it. After all, short, Tall, Curvy or slender we all have it in us to be SEXY!

Materials Needed
- Cricut Explore Air 2 (or other Cricut Cutting Machines that work with Design Space)
- Cricut Design Space Canvas
- Standard Grip Mat
- Fine Point Blade
- Essential Toolkit
- Silver SportFlex Iron On™ (11.8” x 24” roll)
- Black SportFlex Iron On™ (11.8” x 24” roll)
- EasyPress
- EasyPress Mat
- Activewear Top
If you need to order any of these supplies from Cricut.com use Promo Code: QUIETGROVE to get 10% off + free shipping!!
**Note this code does not work on Design Space Access, digital content, machines, EasyPress, Brightpad
Instructions:

- Resize if Needed then click Make it and then click the Mirror button for each Mat.

- Set your Cricut Dial to Custom and then select SportFlex Iron On™ option in the custom materials dropdown list on Design Space.

- Load your SportFlex Iron On™ onto your Standard Grip Mat (liner side down), load mat into your Cricut and start cutting.

- After cutting weed your design with weeding tool (in Essential toolkit) to remove all unneeded iron-on.

- Place shirt on EasyPress Mat ** The EasyPress Mat is Cricut's newest tool to use with their easy press. It shields your work surface from damaging heat (so you can use your table without damaging it) It helps eliminate moisture and directs the heat (from the easy press) to your Iron-On Design creating a better meld to your fabric!

- Preheat the area of your shirt that you will be putting your design (5-10 seconds) then place the first color Of Iron-On where you want it on your shirt. **For this Project I chose to put my Design on the back of my shirt. Follow pressing instructions then repeat with the second color.

EasyPress Ironing Instructions
- Set your EasyPress to 305 F and press Iron-On design for 30 seconds on the front of the garment and then 15 seconds on the back of the garment using medium pressure. Cold Peel.
Regular Iron Instructions (for those who don't have an EasyPress Yet.)
- Set your Iron to the Wool Setting and press the Iron over the Design (using the Iron-On Protective sheet between the Iron and your project) for 50 seconds on the front of the garment and then 15 seconds on the back of the garment using medium pressure. Cool Peel.
**As a side note, Cricut recommends not layering the SportFlex Iron on If you do make sure that you only layer SportFlex Iron On™ with SSportFlex Iron On™ and not going more than two layers max.

**I have done a lot of Custom Iron-on projects but this was my first time using the EasyPress & Mat. I have to say that The EasyPress is like a million times better than a regular Iron. I can see why sooo many people have been raving about it!! Not only was it super easy to use, but I also got a better end result.
I love how my Workout top turned out using the new SportFlex Iron On™ and EasyPress & Mat. Now I need to think of what to put on my workout pants...
If you liked this post then check out these: (CLick on the photo to go to the post)


This is a sponsored conversation written by me on behalf of Cricut. The opinions and text are all mine.



Hi, can you tell me me the cutting settings for a Silhoutte cameo? For sport flex .
Thank you
I am not sure since I used it with my cricut. I would try their HTV setting. (make sure to mirror the image.)