
Easy DIY Back to School Labels Made with a Cricut


Looking for an easier way to label all your kids Back to School supplies?

Yes, it is Back to School time again. This means a lot of you have been getting school supply lists from each of your children's teachers. The good news is that most if not all of these school supplies are on sale right now at your local stores. The bad news is that in many of your cases, in addition to buying all these supplies you are asked to label them with your kid's names.

Now I totally get why teachers ask for you to label the school supplies you are buying for each of your kids. Especially, for little kids. It makes it soo much easier for the teacher to get the school supplies organized after projects. Heck, I have decided to label my kid's supplies this year and I homeschool. I am tired of my kids complaining that their brother or sister used their supply... this way they will always know.

Thanks to my Cricut Explore Air 2 making labels for my kid's supplies is quick and easy. (better even than handwriting them in permanent marker (and easier to read for sure.) While it is fine to use regular vinyl (and stranger tape) for larger labels. (Iike on each folder) when labeling small items (like crayons, pens, markers etc) I recommend utilizing Cricut's Print and Cut feature along with printable Vinyl. The beauty of print and cut labels is you won't need to weed anything or use transfer tape. Keep reading for the step by step instructions.

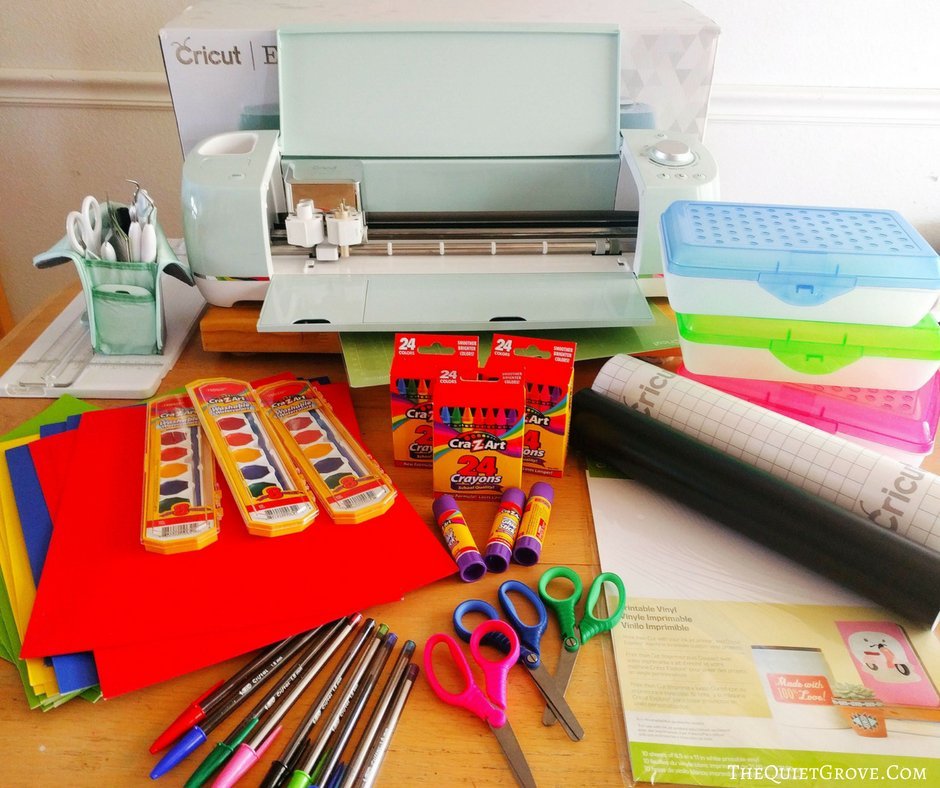
Materials Needed
- Cricut Explore Air 2 (or other Cricut Cutting Machines that work with Design Space)
- Standard and Strong Grip Mat
- Fine Point Blade
- Weeding Tool Set
- Printable Vinyl
- InkJet Printer (I used the Canon MG7720)
- School Supplies
- Black Vinyl
- Transfer Tape
If you need to order any of these supplies from Cricut.com use Promo Code: QUIETGROVE to get 10% off + free shipping!!
**Note this code does not work on Design Space Access, digital content, machines, EasyPress, Brightpad
Instructions:
Print & Cut Labels:
I highly recommend making labels using print and cut especially for really small labels.
- Open a New Canvas in Design Space and Select Box Shape then Click on the little lock icon on the bottom left corner to be able to turn the box into a rectangle large enough to fit the name inside and then click on the color to change from grey to white (or whatever your desired color is.

- Select Text and type in your child's name. Change the font by clicking on the name and then selecting the desired font in the font drop down box.
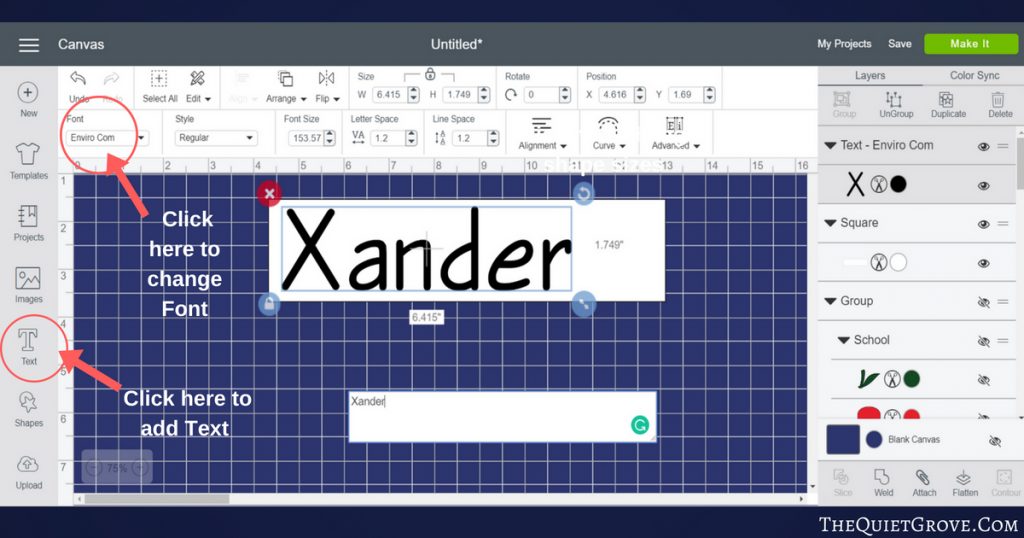
**Optional you can add a fun image like an apple next to the name.

- Once your desired tag is finished. Select all the layers and click the flatten button (this will turn your image to 1 layer ready to print and cut (the outer most layer)

- Then click on your designed tag to resize. I designed 3 different labels for my kid's supplies and then sized each to fit the items I will be putting the labels on. (**If you want here is the link to my Design Space Canvas. You would just need to select the design and click unflatten to switch out the name.)

- Click Make it button and set your Cricut to the custom material of Printable Vinyl.

- Send your design to your Ink Jet Printer. Then, after it's printed place on standard grip mat to cut out

- Place each label sticker on the desired item.

Standard Vinyl Labels:
Again these are fun for larger labels but for those tiny ones I would use the print and cut method above.
- Open a new Design Space Canvas
- Select Text option and Write name, subject or desired label info

- Change text with the text dropdown and size as desired

- Set Cricut material to Vinyl and cut out using standard grip Mat
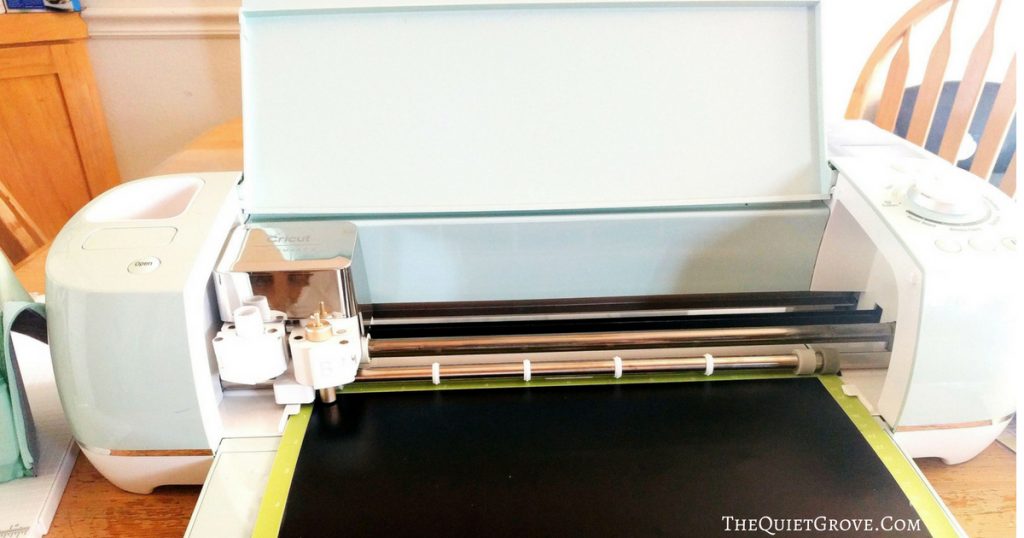
- Weed carefully using weeder (from essential toolkit)

- Cut a small piece of transfer tape (the size of your design) and press over weeded vinyl (I use the scraper tool from the essential toolkit to do this).
- Peel off Vinyl back (transferring your vinyl to the transfer tape)

- Press onto the surface of your item where you want it and carefully peel off transfer tape leaving your vinyl design behind.

For our folders to organize our kid's school work we used vinyl for the subjects and Printable Vinyl for their name. I love how they turned out. I am thinking of getting 3-ring binders to put all the folders in. In which case I will label those as well. It only takes a few minutes but really does help you keep it all organized.

The Theme for this Month's Inspire My Creativity challenge and link party is BACK TO SCHOOL. I hope you enjoyed my tutorial for these easy Back to School Labels that I made using my Cricut. As in months past I am co-hosting the Inspire My Creativity link up along with some of my favorite fellow crafty bloggers on the 2nd Wednesday of each month! Make sure to check out the other great BACK TO SCHOOL projects for this months link up (found at the end of the post) and don’t forget to share your own projects with us.
Next Month’s theme challenge is going to be Leaves. I can’t wait to see what everyone is inspired to create! I invite you to check back on the 2nd Wednesday in July (August 12th) to see what I will be making for my Inspire My Creativity Craft. Oh, and you are welcome to join in the fun and link up your craft as well. I would love to see it!
If you liked this post then check out these: (click on the photo to go to the post)



The school supplies definitely look nicer with labels like these. I love it!!
Thanks
These all look amazing! So many awesome craft ideas for back to school!
I love crafting with my Cricut. The labels look great. Good idea to even label supplies at home.
Labeling supplies is smart when the teacher has 30 kids to keep together.
Ahhhh! I love these labels (and need to upgrade my Cricut!!)
Goodness- I sure wish I had this idea when my kids were little and I had to label every single pencil and crayon! This is so smart!
I know...right? Sure beats doing it by hand.
How small were the labels on the crayons? I did it with Cricut's printable sticker paper and it's way too thick!
The stickers on the crayons are pretty small, which is why I chose to use Cricut Printable Vinyl (rather than their sticker paper) since it is a thinner more pliable material.)
The stickers on the crayons are pretty small, which is why I chose to use Cricut Printable Vinyl (rather than their sticker paper) since it is a thinner more pliable material.