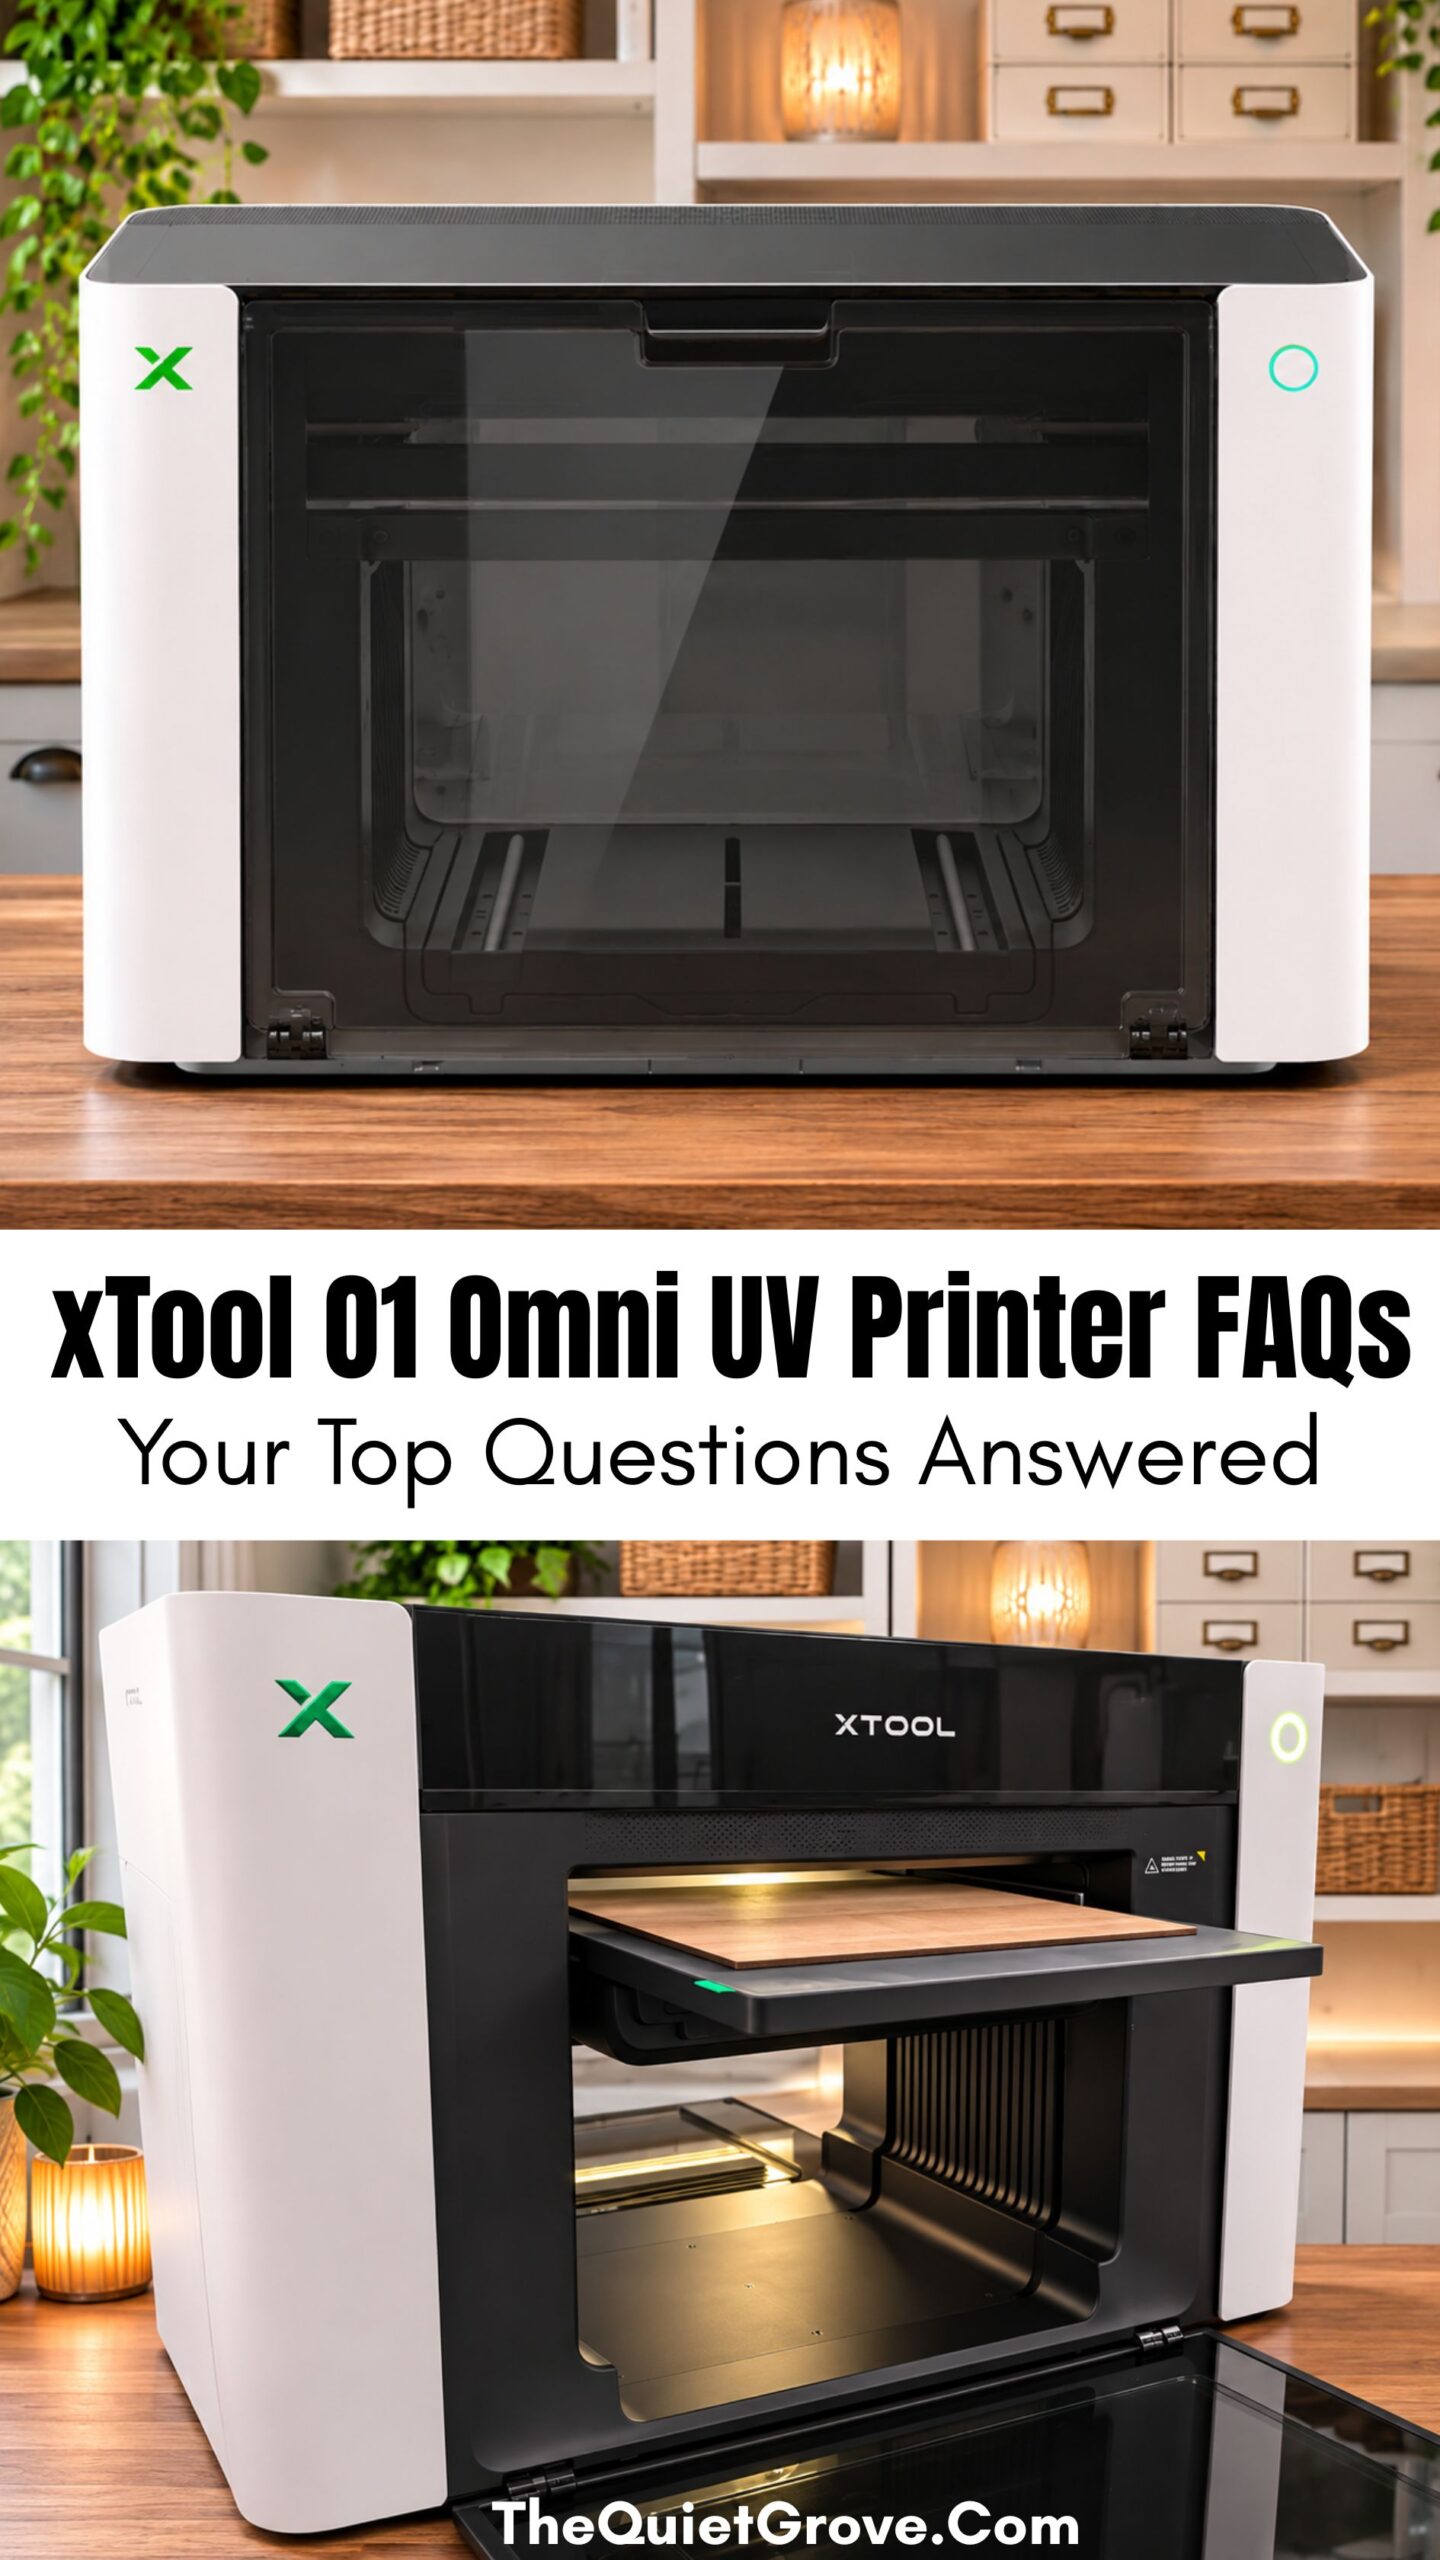
xTool O1 Omni UV Printer FAQs: Your Top Questions Answered
(This article is sponsored by xTool. However, the views and opinions expressed are entirely my own. You can view my full disclosure here.)
Have questions about the xTool O1 Omni UV Printer?
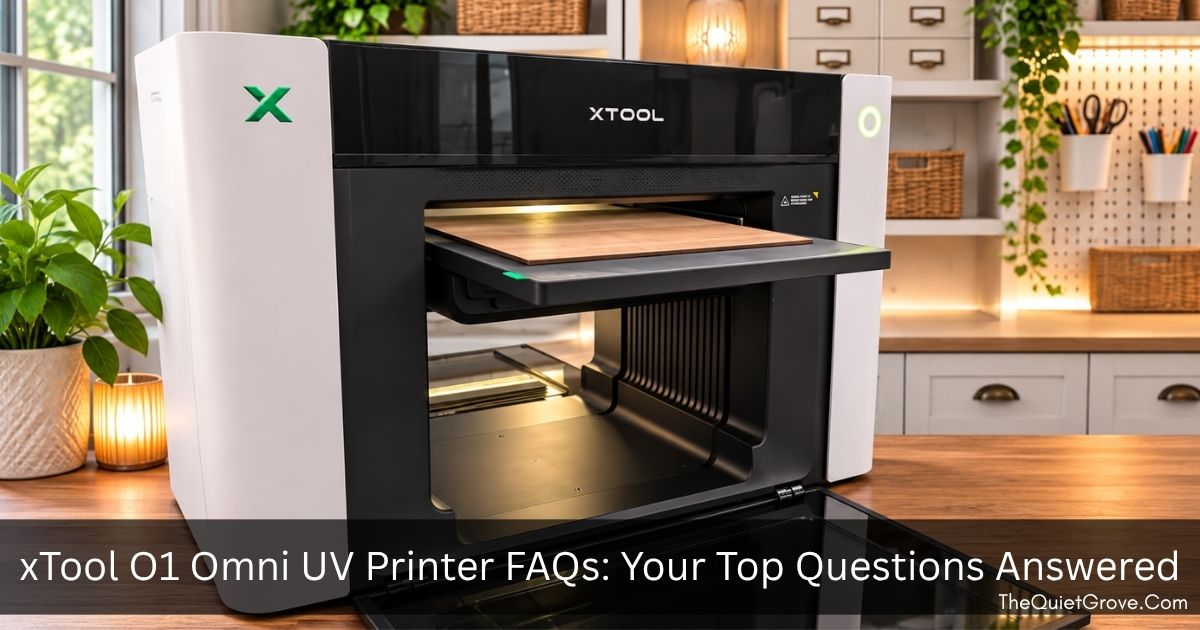
I'm answering some of the most frequently asked questions to help you decide if this amazing machine is right for you!
A few months ago, xTool released its very own UV printer series, the xTool O1 Omni, and ever since, I've noticed many of the same questions popping up from potential buyers and new owners alike. So, I thought it would be helpful to put together an article answering some of the most frequently asked questions about the xTool O1 Omni UV Printer.
First, I have to say that I own the xTool O1 Omni Dual UV Printer, and I absolutely LOVE it! Seriously, this printer is freaking amazing!
As a side note, xTool is running a special Black Friday Sale where you can get $50 off any of their machines (including the O1 Omni --> HERE) with the code: XTOOLGIFT50
Paired with my xTool S1 40W Laser, and F1 Ultra Laser, the O1 Omni has taken my small business to a whole new level. Not only has it opened up so many possibilities for creating exciting new products, but it has also allowed me to go back and update some of my most popular designs in ways I couldn't before. Being able to add beautiful, full-color prints to my laser-cut projects has been a total game changer!
Now, I'm not going to say there isn't a learning curve when it comes to using the O1 Omni Printer. There definitely is, especially when you're experimenting with different materials and printing techniques. However, overall, I've found the machine surprisingly easy to set up and use.
Have I had a few failed projects along the way? Absolutely! But thankfully, I've been able to figure out what went wrong, make a few adjustments, and get much better results the next time around. Honestly, experimenting and learning what works is part of the fun of getting a new crafting machine!
So, if you've been thinking about getting an xTool O1 Omni UV Printer but have a few questions before taking the plunge, I've got you covered!
Below, I'm answering some of the top questions I've seen asked over and over again, along with sharing my own experiences and tips from using the machine.
And, of course, if you have a question I haven't answered in this article, feel free to leave it in the comments below! I'll do my best to answer it and help you out.
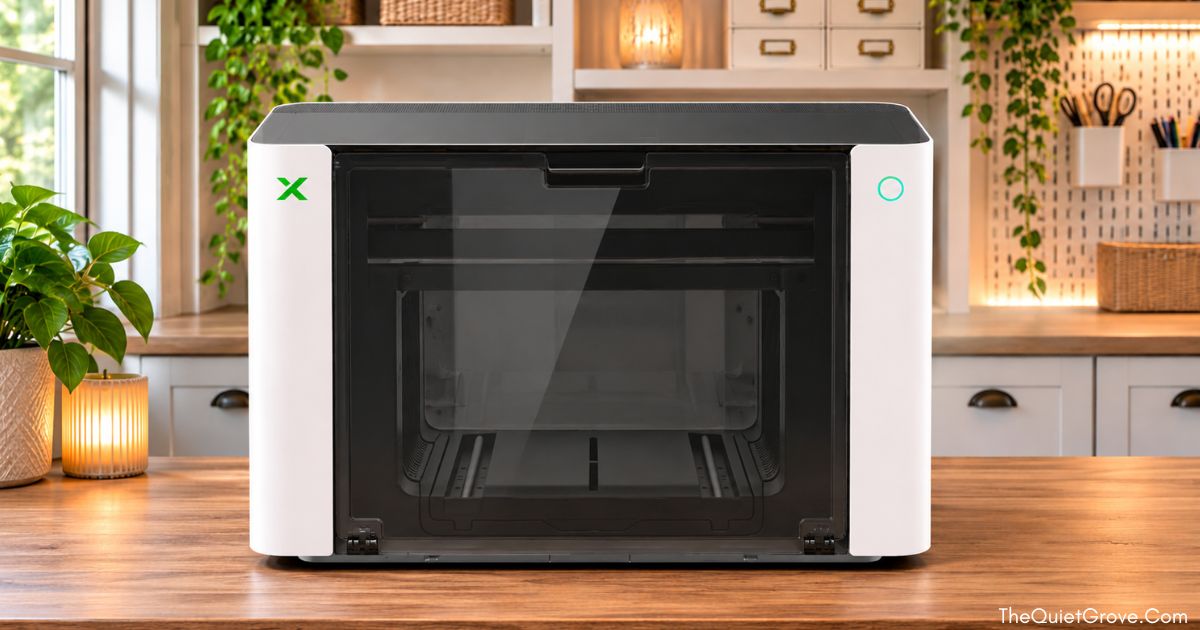
xTool O1 Omni UV Printer: Frequently Asked Questions
What Is the Difference Between the Three xTool O1 Omni Printers?
One of the biggest questions I've seen is what exactly makes the three xTool O1 Omni printers different and which one is the best choice.
While all three machines share many of the same features, there are some important differences when it comes to their inks and printing capabilities.
xTool O1 Omni Single Head UV Printer
The Single Head O1 Omni is xTool's entry-level UV printer. It uses CMYK (Cyan, Magenta, Yellow, and Black) UV inks along with Rigid White UV ink.
This machine is designed primarily for printing on hard surfaces such as wood, metal, acrylic, glass, and slate.
With additional accessories, it can also create UV DTF transfers (permanent stickers) and foil designs.
If you're looking for a basic UV printer to personalize hard surfaces and don't need the extra ink options, this is a great place to start!
xTool O1 Omni Dual Head UV Printer
This is the version I own, and I absolutely LOVE it!
The Dual Head O1 Omni has everything the Single Head offers, but with an additional print head that expands what you can create.
In addition to the standard CMYK and Rigid White inks, the second print head contains:
- An additional, larger-capacity Rigid White ink cartridge
- Flexible White UV ink
- Red Fluorescent UV ink
- Yellow Fluorescent UV ink
The extra Rigid White ink is especially useful if you plan to do a lot of textured or raised printing, where multiple layers of white ink are built up to create a dimensional effect.
The Flexible White ink also opens up more possibilities for printing on materials such as leather, canvas, cardstock, and paper.
And then there are the fluorescent inks! These allow you to add special fluorescent details to your projects that glow under black light. How fun is that?!
If you want to experiment with different materials, create dimensional prints, or use fluorescent inks, the Dual Head version is definitely worth considering.
xTool O1 Omni UV+DT Printer
The UV+DT version also has two print heads, but instead of the additional UV inks found in the Dual Head model, its second print head is designed for garment printing.
The first print head contains the standard CMYK and Rigid White UV inks, while the second uses specialized inks for DT printing.
This allows you to create UV-printed products as well as DTF (Direct to Film) and DTG (Direct to Garment) designs for clothing.
However, you are trading the additional Rigid White, Flexible White, and Fluorescent UV inks for those garment-printing capabilities.
So, which O1 Omni should you choose?
It really comes down to what you want to make!
If you're mainly interested in printing on hard surfaces and want to keep your initial investment lower, I would recommend the Single Head.
If you're planning to create lots of raised or textured prints, want to work with more flexible materials, or love the idea of fluorescent designs, I would go with the Dual Head.
And if you want to combine UV printing with printing designs for clothing, the UV+DT version is the one to look at.
Personally, I went with the Dual Head because I wanted as many creative possibilities as possible for my small business, and I haven't regretted that decision!
If All Three O1 Omni Printers Can Do UV DTF, Doesn't That Mean They Can All Print on Clothing?
Nope! This is actually a really common point of confusion.
While UV DTF and traditional DTF printing sound almost identical, they are two completely different printing processes.
DTF simply stands for Direct to Film. However, the type of ink and how the finished transfer is applied make a big difference.
UV DTF printing uses UV ink to create permanent adhesive transfers that can be applied to hard surfaces.
These are especially useful for objects that are difficult to print on directly.
For example, I recently wanted to add a design to some paper gift bags. Unfortunately, because of the folds and creases in the bags, I couldn't get a clean direct print without running into overspray issues.
My solution? I printed UV DTF transfers instead and applied them directly to the bags. Problem solved!
Traditional DTF printing for clothing, on the other hand, uses different inks and a different transfer process. The design is printed onto special film, prepared with adhesive powder, cured, and then heat-pressed onto fabric.
So yes, all three O1 Omni printers can create UV DTF transfers with the appropriate accessories, but only the UV+DT version has the additional garment-printing capabilities.
Do I Need the Roll Feeder to Make UV DTF Stickers?
No! You do not need the Roll Feeder to make UV DTF transfers.
You will, however, need the Laminator to apply the B film to the printed A film.
The Roll Feeder is primarily designed to make printing from a continuous roll easier, especially when you're working on larger projects or producing multiple transfers.
For smaller projects, I actually think cutting your A film to size and printing it directly on the mat is a great option.
Not only is it easy, but it can also help minimize wasted material.
Once you've finished printing, you simply run the printed A film through the Laminator to apply the B film.
That being said, the Roll Feeder is definitely worth having if you're planning to make a lot of UV DTF transfers.
It allows you to print directly from the roll, makes longer designs possible, and saves time when working on larger batches.
For someone running a small business and regularly filling larger orders, that convenience can make a big difference!
Do I Need the xTool Laminator to Use the Roll Feeder?
Yes. While you can use the xTool Laminator independently, the Roll Feeder is designed to work together with it.
The Laminator is what pulls the material through from the Roll Feeder.
You can absolutely use the Laminator without purchasing the Roll Feeder. Simply cut your A film or foil to the size you need and feed it through the Laminator.
However, if you want to use the Roll Feeder, you'll also need the Laminator.
Do I Need the Laminator to Do Foiling?
Yes! The Laminator is used for both foiling projects and creating UV DTF transfers.
While I've seen some people experiment with third-party laminators, I would personally recommend using the xTool Laminator.
It is designed specifically to work with the O1 Omni system, making the process much more straightforward.
If you plan to do a lot of UV DTF or foil projects, I would definitely consider the Laminator an essential accessory.
Can the O1 Omni Print on Round Objects Like Mugs, Tumblers, Ornaments, and Napkin Rings?
Yes! And this is one of the features that opens up so many fun possibilities.
With the O1 Omni Rotary Attachment, you can print directly onto compatible cylindrical and round objects, including mugs, tumblers, ornaments, and other curved items.
Just make sure the object fits within the Rotary's supported size and shape requirements.
Can I Use My xTool RA2 Pro Rotary Attachment With the O1 Omni?
Unfortunately, no.
I already own the RA2 Pro for my xTool lasers, so I completely understand why people would want to use an attachment they already have.
However, the O1 Omni uses its own specially designed Rotary Attachment.
The RA2 Pro and other xTool laser rotary attachments are not compatible with the O1 Omni.
Can I Switch the Rigid White Ink in the Single Head O1 Omni for Flexible White Ink?
At this time, no.
The Rigid White ink cartridge used in the Single Head and the Flexible White cartridge used in the Dual Head are different sizes.
xTool has mentioned that they are exploring the possibility of allowing users to switch between Rigid White and Flexible White inks in the future.
However, there is currently no confirmed release date or official process for doing so.
One of the challenges is that switching ink types would require completely flushing the existing ink from the lines before introducing the new ink. This could result in a considerable amount of wasted ink.
So, for now, if Flexible White printing is something you know you want, I would recommend purchasing the Dual Head version rather than counting on a possible future update.
If I Run Out of One Ink, Can I Still Print Without Using That Color?
This one is a little complicated because the answer depends on which O1 Omni you own and which ink runs low.
Originally, the O1 Omni would stop allowing new prints whenever an ink cartridge reached approximately 20% remaining.
Why 20% instead of waiting until the cartridge is completely empty?
The printer needs to maintain a certain amount of ink in its system so it can continue circulating and protecting the ink lines and print heads. Allowing the system to run dry could cause serious damage.
However, xTool has since introduced an update that allows certain print heads to be placed into a sleep state.
For example, if you own the Dual Head O1 Omni and run low on the additional Rigid White, Flexible White, or Fluorescent inks, you can put that second print head to sleep while waiting for replacement ink.
You can then continue printing with the first print head using CMYK and the standard Rigid White ink.
Similarly, if you have the UV+DT version, you can put one print head to sleep and continue using the other, provided it has the necessary ink.
Unfortunately, if you have the Single Head version, you don't have that second print head to fall back on.
This is one reason I recommend keeping an eye on your ink levels and ordering replacements before you get too low, especially if you use your printer for business orders.
Is It True That Replacement xTool O1 Omni Inks Are Impossible to Get Right Now?
No, but there have definitely been some frustrating supply issues!
Since the O1 Omni launched, demand for replacement inks has been extremely high.
My guess is that xTool sold more printers than initially anticipated, and many new owners also purchased extra ink to have on hand, especially those planning to use their machines for small businesses.
Unfortunately, this resulted in several ink cartridges being backordered.
The good news is that xTool has been working to increase production and catch up with demand.
In a recent announcement shared in the official xTool O1 Omni Facebook group, xTool acknowledged the delays and provided an update on its ink production and shipping progress.
According to that announcement:
- Since mid-October, production has increased to more than 40,000 ink cartridges per week, enough for at least 5,000 complete ink sets.
- Production capacity has increased by approximately 35% compared with mid-September.
- Multiple shipments are on their way, with enough ink in transit to cover existing orders placed through October 31, 2026.
- Some individual ink cartridges may remain in limited supply through December.
- xTool is also arranging expedited air shipments to help replenish inventory faster.
One important thing xTool clarified is that ink orders don't necessarily ship in the exact order they were placed.
Shipping depends on your region, which specific cartridges you ordered, and which inks are currently available.
For example, someone who ordered a single cartridge that's in stock may receive their order before someone who placed an earlier order for a complete ink set containing a backordered color.
xTool also explained that placing multiple additional orders won't move your existing order higher in the fulfillment queue.
If you're currently unable to use your printer because you're waiting for ink, xTool recommends contacting its support team for assistance.
So, while the ink shortage has definitely been inconvenient, the good news is that production has increased and more ink is on the way!
Hopefully, as these shipments arrive and outstanding orders are fulfilled, replacement ink availability will become much more consistent.
Note: This information is based on xTool's November 2026 supply update. Since inventory changes, I recommend checking current availability before ordering.
Do the xTool O1 Omni Inks Have an Expiration Date?
Yes. The O1 Omni inks have a stated shelf life of 12 months.
This is something to keep in mind if you're thinking about stocking up on extra ink.
While having replacement cartridges available is helpful, especially if you're running a business, I wouldn't recommend purchasing more than you realistically expect to use within their shelf life.
Will I Eventually Have to Replace the O1 Omni Print Heads?
Yes. Just like other inkjet printers, the O1 Omni's print heads will eventually need to be replaced.
However, there isn't a strict replacement schedule.
How long your print heads last will depend on several factors, including how frequently you print, your maintenance routine, and the temperature and humidity of the room where you keep your machine.
Some UV printer owners report print heads lasting a year or longer, while others have experienced issues much sooner.
The good news is that the O1 Omni has several built-in features designed to help protect the print heads.
These include automatic white ink circulation, ink stirring, and a moisturizing system that helps prevent ink from drying out when the printer isn't being used.
Of course, these features don't eliminate the need for regular maintenance.
I would definitely recommend keeping up with the weekly maintenance tasks, including cleaning the ink pads, ink scrapers, and other areas identified in xTool's maintenance instructions.
Taking good care of your printer is one of the best ways to help extend the life of its print heads.
You can learn more in xTool's official O1 Omni support documentation.
Where Can I Purchase Replacement O1 Omni Print Heads?
Replacement print heads are expected to be available directly through xTool.
At the time of writing, they aren't yet listed for general purchase, and there isn't an official replacement price available.
One thing I do want to point out is that print heads can be expensive.
If you're using your O1 Omni for a small business, I would recommend factoring future maintenance and replacement costs into your product pricing.
That includes not only the ink used for each project but also moisturizing fluid, waste ink cartridges, and eventually replacement print heads.
I also think it's a good idea to set aside a portion of your profits for future printer maintenance.
That way, when something eventually needs replacing, you're not scrambling to cover an unexpected expense.
Do I Have to Use My O1 Omni Every Day to Keep It Working?
No! Thankfully, you don't have to print something every single day.
I personally try to use mine at least every few days, but the O1 Omni has a built-in moisturizing and ink circulation system designed to protect the printer when it's not actively printing.
This helps keep the ink moving and prevents it from settling or drying inside the print heads.
That being said, I still think regularly using your printer is a good habit, especially if you're running a small business.
Am I Supposed to Leave My O1 Omni Turned On All the Time, Even at Night?
Yes! Under normal operating conditions, the O1 Omni is designed to remain plugged in and powered on, even when you're not actively using it.
This allows the printer to continue its automatic maintenance and moisturizing cycles.
When the printer hasn't been used for a while, it automatically enters sleep mode.
Then, when you're ready to print again, it wakes up and prepares the system.
Depending on the room temperature, you may need to wait a few minutes for the print heads to warm up before printing.
One tip I highly recommend is doing a quick nozzle check before starting a project.
I simply place a sheet of regular paper on the printing mat and run the nozzle check to make sure everything is working correctly.
If I notice any missing lines or other issues, I run a standard print head cleaning cycle.
Most of the time, that fixes the problem right away, especially if I haven't printed for a couple of days.
There have been a couple of occasions when I've needed to run a deeper cleaning cycle, but thankfully, those have been pretty rare.
Taking a minute to check your nozzles before printing can save you from wasting materials and ink on a failed project.
What Happens If I Go on Vacation and Can't Use My O1 Omni for a While?
This is another question I see quite often, and thankfully, xTool thought of it!
The O1 Omni has a special Vacation Mode designed to protect the printer during extended periods when it won't be used.
The system uses its maintenance and moisturizing features to help prevent the ink from drying out while you're away.
According to xTool, Vacation Mode is designed for absences of up to two weeks.
I've seen some beta testers mention leaving their machines in Vacation Mode for longer without issues, but personally, I would stick with xTool's official recommendations.
If you're planning to be gone longer than two weeks, I would contact xTool support to ask about the best way to protect your printer.
I would rather take a few extra precautions than risk damaging an expensive machine!
How Do You Keep the O1 Omni Printing Mats Clean If UV Ink Doesn't Come Off?
One thing you'll quickly discover is that once UV ink has cured on the printing mats, it isn't easy to remove.
And if you're doing a lot of printing, especially projects that go close to the edges of your materials, you're probably going to end up with some overspray.
Thankfully, there are a few ways to deal with this.
xTool sells replacement printing mats, so you can replace them if they become too dirty or lose their stickiness.
I've also seen people use silicone mats as a protective layer because cured UV ink generally doesn't adhere well to silicone.
My personal solution is even simpler: clear transfer tape!
I place clear transfer tape or contact paper over my printing mats, with the sticky side facing up.
This helps protect the original mat from overspray while still giving me a surface that can hold my materials in place.
When the protective layer gets too messy, I can simply replace it.
It's an inexpensive solution that has worked really well for me!
Can I Print With the O1 Omni and Then Cut the Design With an xTool Laser?
Yes! And this is one of the features that makes the O1 Omni especially exciting for those of us who already own an xTool laser.
The O1 Omni supports an integrated print-and-cut workflow with select xTool laser machines.
Currently, the supported models include:
If you own one of these machines, you can use the supported workflow to print your design and then cut it with your laser.
However, I want to point out that you don't necessarily need a compatible laser to make beautiful projects with the O1 Omni.
You can also print directly onto precut blanks or designs you've already made.
In fact, even though I own the xTool S1 40W Laser, I often prefer cutting my wood designs first and then printing on them afterward.
Why?
For one thing, it can help reduce wasted wood.
But another big reason is that I don't have to worry about ash or soot from the laser cutting process getting onto my freshly printed design.
For many of my projects, I find it easier to cut, clean, and then print.
Both methods have their advantages, so it's really a matter of figuring out which workflow works best for what you're creating.
Is the O1 Omni Masking Feature Difficult to Use?
Not at all! I've actually found the masking feature pretty easy to use.
That being said, I don't always use it.
The O1 Omni has a really good camera and scanning system, which makes it easy to see where your design will be placed on your material.
For certain projects, especially when I'm printing a design inside a precut shape and don't need the artwork to extend all the way to the edges, I actually find it easier to position the image manually.
I can simply use the camera preview to center the design where I want it.
Of course, for projects that require more precise edge-to-edge alignment, the masking feature can be incredibly helpful.
It's really a matter of personal preference and what you're making.
Do I Always Have to Print White Ink Under My Designs?
Nope! And this is one of the things I really like about the O1 Omni.
You have quite a bit of control over how your designs are printed.
Depending on your project, you can choose from different printing combinations, including:
- Color only
- White + Color
- Color + White
- White + Color + Varnish
- Color + White + Varnish
- Varnish only
You can also adjust how many layers of white, color, or varnish you want to print.
When you select your material in xTool Studio, the software provides recommended settings, but you can easily adjust them to get the results you want.
For example, xTool often recommends four layers of white ink when printing on wood.
Personally, for many of my wood projects, I've found that I can get great results using fewer white layers. Sometimes I only use one!
Of course, it depends on the wood, the colors in my design, and the effect I'm trying to achieve.
One of my favorite things to experiment with is printing on clear acrylic.
If you print color without a white backing layer, you can get a beautiful translucent effect, almost like stained glass.
Adding white ink behind the design makes the colors much more opaque and vibrant.
If you're printing on a white surface, you may not need a white layer at all, although I've found that even one layer can sometimes improve the final results.
For darker or nonwhite materials, white ink is especially helpful because it provides a base that keeps your colors from looking dull or transparent.
My advice? Don't be afraid to experiment with different layer settings.
You might be surprised by how much the final look can change just by adjusting the amount of white ink you use!
Do I Need to Use an Adhesion Promoter When UV Printing on Certain Materials?
Yes! If you're planning to print on smooth, nonporous surfaces like glass, ceramic, acrylic, or metal, you'll want to use an Adhesion Promoter before printing.
Why? Because these surfaces are so smooth, UV ink can have a difficult time properly adhering to them. An Adhesion Promoter helps prepare the surface so the ink can form a stronger bond with the material.
Without it, your beautiful printed designs may easily scratch, chip, or peel off. And nobody wants that!
Personally, I use xTool's Adhesion Promoter Wipes, and they've worked great for me! So far, I haven't had any issues with scratching or chipping on the products I've printed using them.
xTool offers different Adhesion Promoter Wipes specifically formulated for:
- Metal
- Acrylic
- Glass and Ceramic
Just make sure you're using the correct wipes for the material you're printing on!
There are other brands of UV printing adhesion promoters available, but I've heard mixed reviews about their effectiveness. Since I've had such good results with xTool's wipes, I've decided to stick with what works.
The wipes come in boxes of 50, with each wipe individually wrapped, which makes them really convenient to use.
Here's a little money-saving tip: Whenever possible, I try to prep several items at once with a single wipe. For example, if I'm printing on metal coins or acrylic ornaments, I'll prepare multiple pieces at the same time rather than opening a new wipe for each one.
This helps me get the most out of each wipe and reduces unnecessary waste.
Of course, you'll want to follow the application instructions and make sure each surface is properly prepared before printing.
It's a simple extra step, but one that can make a big difference in the durability and quality of your finished UV-printed projects!
Do I Need to Vent the O1 Omni Out a Window or Purchase an External Air Purifier?
The O1 Omni comes with a built-in air filtration system, which is definitely a nice feature.
According to xTool, the internal filtration system can remove up to 96.4% of TVOCs under its specified testing conditions when operating with the doors closed.
However, there are some important things to consider.
If you're using the smaller printing mat, you can generally operate the printer with the doors closed.
But if you're using the Rotary Attachment, large printing mat, or Roll Feeder, you'll need to operate the printer with one or both doors open.
This means more printing fumes can escape into the surrounding room.
For that reason, I would recommend having additional ventilation or an external air purifier designed to handle VOCs, especially if you're planning to use your printer frequently.
The O1 Omni includes a ventilation hose that can be used to exhaust fumes outdoors, and xTool also offers the AP2 Air Purifier, which can connect directly to the machine.
I don't have the AP2 yet, but I do have an air purifier next to my printer that I keep running, even when the machine isn't actively printing.
For me, having good air quality in my crafting space is important, especially since I spend so much time working there.
Is It Okay to Place the O1 Omni Near a Window?
Its not recomended per se, but Yes you can do so, you'll just want to take some precautions if you do.
UV light can be a serious problem for UV printers because exposure can cause the ink to cure where it isn't supposed to, potentially damaging the ink system and print heads.
This is especially important if your printer is near a window where direct sunlight can reach it.
If you plan to keep your O1 Omni near a window, I would recommend using UV-blocking window film or blackout curtains to help protect the machine.
I actually keep my O1 Omni near a window, so this is something I've been careful about.
In addition to blocking the sunlight, I also use a protective cover over the main unit when it isn't in use.
I just make sure the cover doesn't block the printer's ventilation or interfere with its normal maintenance functions.
A little extra protection is definitely worth it when you're dealing with an expensive machine!
Do I Need to Live in a Humid Climate to Use the O1 Omni?
No, but humidity is definitely something you need to pay attention to!
I live in Utah, which is a desert climate, so keeping the humidity at the recommended level can be a bit of a challenge.
For optimal printing conditions, xTool recommends maintaining a relative humidity of approximately 50–80%.
If the air is too dry, it can increase the chances of ink drying out around the print heads and causing nozzle issues.
My solution has been to use an evaporative humidifier near my O1 Omni to help maintain a more consistent humidity level.
One thing I would recommend is choosing an evaporative humidifier rather than a mist-style humidifier. This is the one I have from Amazon.
You don't want moisture droplets or mineral residue settling onto your printer.
Temperature is another important factor.
The O1 Omni works best in a controlled environment where the temperature stays relatively consistent.
This is something to think about if you're planning to keep your printer in a garage, outdoor workshop, or other space that experiences extreme temperature changes.
I would be very cautious about putting the machine anywhere that gets excessively hot, cold, or dry unless you have a reliable way to control the environment.
How Big Is the xTool O1 Omni Printer?
The O1 Omni is a pretty substantial machine, so you'll definitely want to make sure you have enough room for it before purchasing.
The main printer measures approximately:
28.1 inches wide × 14.7 inches deep × 18.4 inches high
It also weighs approximately 90 pounds, depending on the configuration.
But here's something important to remember: those measurements are just for the main printer!
You'll also need to account for the space required to open the front and rear doors.
And if you're planning to purchase the Laminator and Roll Feeder, you'll need additional space for those accessories as well.
The Laminator attaches to the front of the printer, so make sure your table or work surface is deep enough to accommodate it.
I would definitely recommend measuring your available space before ordering, rather than assuming it will fit because the main unit dimensions look manageable.
Can You Remove the Front and Back Doors of the O1 Omni?
Yes!
The front and rear doors are attached magnetically, making them easy to remove and put back on.
This is especially handy when you're working with larger materials or using certain accessories.
Just remember that operating the printer with the doors open or removed allows more fumes to escape into the room.
You'll want to make sure you have appropriate ventilation and follow the recommended safety precautions when using the machine this way.
Is the O1 Omni Difficult to Set Up?
I didn't think so!
Now, I'm not going to say it only takes a few minutes because there are several steps involved in getting everything ready.
You'll need to unpack the machine, install the ink cartridges, set up the waste ink and moisturizing systems, and complete the initial priming and calibration.
However, xTool does a really good job of walking you through the process.
The first part of the setup includes written instructions.
Then, once you've powered on the machine and connected it to xTool Studio, the software provides step-by-step video instructions to help you prime the ink channels and complete the necessary calibrations.
I really appreciated having those videos because they made it much easier to understand exactly what I needed to do.
Overall, I found the setup process pretty straightforward.
It takes a little time, but I wouldn't consider it difficult, even if you're new to UV printing.
Is UV Ink Toxic?
Uncured UV ink does contain chemicals that can be hazardous, which is why it's important to handle it carefully.
Similar to UV resin, liquid UV ink contains components that can irritate your skin and eyes and may cause allergic reactions with repeated exposure.
This is why you should wear appropriate protective gloves when handling ink, replacing cartridges, or cleaning parts that may have uncured ink on them.
Proper ventilation is also important because UV printing can release fumes and other airborne contaminants during the printing and curing process.
The good news is that the O1 Omni has a built-in UV curing system, so the ink is cured as part of the printing process.
Once properly cured, the finished prints are generally safe to handle during normal use.
However, that doesn't automatically mean every printed item is food-safe, dishwasher-safe, or appropriate for direct skin contact.
For products like mugs, dishes, or items intended for children, I would always check the specific material and ink safety recommendations before deciding how to use them.
Does the O1 Omni Use Ink Cartridges, and Can I Use Third-Party Inks?
Yes, the O1 Omni uses replaceable ink cartridges.
However, it is designed to use xTool's proprietary inks, and third-party inks are not officially supported.
Using incompatible inks could damage the printer or affect warranty coverage, so I personally wouldn't recommend taking that risk.
The good news is that I've found xTool's UV inks to be reasonably priced, especially when you can purchase them during a sale.
And because the printer uses individual cartridges, you can replace the inks you need rather than replacing every color at once.
How Should I Dispose of Empty Ink Cartridges, Waste Ink, and Used Maintenance Supplies?
Because UV inks contain chemicals that can be hazardous before curing, I wouldn't recommend simply tossing ink waste or contaminated maintenance supplies into your regular trash.
Instead, check with your local household hazardous waste facility to see how they recommend disposing of these materials.
Many communities have designated collection centers where residents can drop off items such as paints, solvents, and other potentially hazardous household products.
Keep in mind that business-generated waste may have different disposal requirements than household waste.
I think it's worth taking a few minutes to find out what your local regulations require, especially if you're using your O1 Omni regularly for business.
Do I Need to Wear Protective Glasses When Using the O1 Omni?
This depends on how you're operating the printer.
When the O1 Omni is being used with its protective doors properly closed, those doors are designed to shield users from the UV curing light during normal operation.
However, if you're printing with the doors open or removed, you'll want to use appropriate UV-rated protective eyewear and follow xTool's safety instructions.
The printer comes with a pair of protective glasses for this purpose.
I would definitely recommend keeping them somewhere easy to access so you have them available whenever you need them.
Is the xTool O1 Omni UV Printer Worth It for a Small Business?
Ultimately, this is something you'll need to decide based on your budget, the types of products you want to make, and how you plan to use the machine.
The O1 Omni is definitely an investment, and there are ongoing costs to consider, including ink, maintenance supplies, and eventually replacement parts.
However, I also think there is a lot of potential for small businesses that create personalized gifts, home decor, promotional products, and other custom items.
And if you already own a laser cutter or engraver, the O1 Omni can open up even more possibilities.
For me, being able to combine my xTool S1 Laser with full-color UV printing has been an absolute game changer.
I can now create products that would have been difficult or incredibly time-consuming to make before.
I can add beautiful, detailed color prints to wood, acrylic, metal, and other materials without having to hand-paint everything.
And I can go back to some of my older, popular designs and give them a completely new look.
Personally, I absolutely think the O1 Omni Printer has been worth it for my small business.
But I would encourage anyone considering purchasing one to think about what they actually want to create and which version of the printer best fits those needs.
You don't necessarily need the most expensive model to make amazing products.
The best printer is the one that gives you the features you'll actually use and helps you create products you love!
Final Thoughts on the xTool O1 Omni UV Printer
While I'm completely new to the world of UV printing, I have to say that the xTool O1 Omni has been an incredible addition to my small business! Not only has it opened up so many new possibilities for the products I can create, but it has also been just plain FUN to experiment with!
Seriously, the creative possibilities seem almost endless, and I feel like I've only scratched the surface of what this machine can do. I love being able to try new materials, experiment with different printing techniques, and come up with new ways to combine UV printing with my laser crafting projects.
Of course, I'm still learning as I go, but that's part of the fun!
I'll be sharing a more in-depth review of my personal experience with the xTool O1 Omni soon, including what I love about it, what I've learned along the way, and a few things I wish I'd known before getting started. So stay tuned!
I'm also planning to share more DIY UV printing tutorials here on The Quiet Grove to help you get the most out of your own O1 Omni.
Is there a specific project or UV printing technique you'd love to see a tutorial on? Let me know in the comments below! I'm always looking for fun new projects to try, and I'd love to hear what you're interested in making.
And, of course, if you have any additional questions about the O1 Omni that I didn't cover in this article, feel free to ask those in the comments as well. I'll do my best to help!
If you liked this article, then check out these: (click on the photo to go to the articles)