Your Complete Guide to the Cricut Explore 3 + Exclusive DIY Waterproof Sticker Tutorial!

(This article is sponsored by Cricut. However, The thoughts and opinions expressed are entirely my own. You can read my full disclosure here)
Are you trying to decide if the Cricut Explore 3 is the right crafting machine for you?

Welcome to your ultimate guide to the Cricut Explore 3! Throughout this comprehensive article, I'll address the most pressing questions about this innovative crafting machine, assisting you in determining if it aligns with your creative needs.
Moreover, I'll walk you through an effortless, beginner-friendly project tutorial designed specifically for the Cricut Explore 3. Plus, I'll provide links to a plethora of additional projects, showcasing the machine's remarkable versatility and offering boundless inspiration for your crafting endeavors. Let's dive in and unlock the full potential of this extraordinary tool!
As you may know, I received the Cricut Explore 3 a few months ago for testing and review purposes. I've been thoroughly impressed with this crafting machine, from its stunning aqua matte finish to its enhanced speed and crafting precision. Having put the Explore 3 through rigorous testing, I'm excited to share my comprehensive review and address common questions that frequently arise about it.

As a passionate crafter with years of experience in Cricut crafting, I frequently encounter inquiries about Cricut machines. When people discover my dedication to crafting with Cricut and the DIY tutorials I offer on my blog, they often pose a variety of questions. Common queries include: "Do you enjoy using your Cricut?" "Will I use my Cricut enough to justify its cost?” "What kind of projects can I create with my Cricut?" and "Is it challenging to learn how to use a Cricut?" Let's explore these questions together geared toward the Cricut Explore 3 specifically.
Do I like my Cricut Explore 3?

Absolutely! I can't express enough how much I adore my Explore 3. Having acquired it a couple of months back, I've truly tested its capabilities during this time and found it to be an exceptionally reliable and user-friendly crafting machine. What's remarkable is that it retains all the functionalities of my older Explore 2 while also boasting enhanced speed and the ability to cut Smart materials without a mat, thus expanding the scope of projects I can effortlessly create with my Cricut.
Let's talk about Smart Materials really quick – a game-changer in the world of Cricut crafting. Cricut's Smart materials feature specialized backing designed for cutting on Explore 3 and Maker 3 machines, thanks to their integrated sensors. What's truly remarkable is that these materials eliminate the need for a cutting mat altogether. Smart Vinyl and Smart Iron-on come in generous rolls, allowing for the continuous cutting of long designs without interruptions. This feature proved invaluable when I crafted a custom Holiday table runner. To streamline the handling of Smart Vinyl and Smart Iron-On rolls, Cricut offers a Roll Holder compatible with both the Explore 3 and Maker 3, accommodating rolls ranging from 4 to 75 feet and even featuring a built-in trimmer for added convenience.

Another standout Smart material in my crafting arsenal is the Smart Sticker Cardstock. This innovative product has become a staple in my paper crafting projects, thanks to its adhesive sticker backing, which eliminates the need for messy glues when layering cardstock.
I find immense pleasure in utilizing Cricut's Smart materials, but my crafting adventures extend beyond them. I thoroughly enjoy working with a diverse array of materials that still necessitate the use of cutting mats, including faux leather, paper, sticker paper, and infusible ink. What's truly fantastic about my Cricut Explore 3 is its versatility—it seamlessly accommodates both types of materials, allowing me to explore endless creative possibilities without limitations.
Will I use my Cricut Explore 3 enough to justify its cost?
Answering this question is a bit tricky, as it largely depends on your personal preferences and crafting habits. Speaking from my own experience, the answer is a resounding YES! The more I delve into using my Cricut machines, particularly the Explore 3, the more I discover reasons to utilize it. I often jest that Cricut machines should come with a warning label stating, "Caution: Cricut Crafting may lead to addiction!" I derive immense joy from embellishing my living space with handmade decor, especially during festive seasons, crafting bespoke clothing for loved ones, creating personalized gifts, and maintaining an organized lifestyle.
With my Cricut Explore 3, I can accomplish all of these tasks at a fraction of the cost compared to purchasing custom items from others. This versatile machine empowers me to unleash my creativity and craft unique decorations, labels, clothing, and gifts, all while saving money.
Each time I complete a project, I discover an insatiable desire to create even more. Take, for instance, the first time I crafted a custom banner—it was so straightforward that I immediately envisioned making additional ones for various holidays and special occasions. Just this week, I whipped up a delightful Easter Banner using colored and white cardstock, layered with letters cut out of gold iron-on. Surprisingly, iron-on can be used on paper materials, and the result is stunning, as you can see. If you'd like me to share the tutorial for creating this "He is Risen" Banner using the Cricut Design canvas on my blog, please let me know in the comments below!

As I mentioned before, with each creation I embark upon—whether it's custom clothing, labels, cards, mugs, banners, home decor items, wreaths, gift tags, personalized gifts, and beyond—I'm consistently driven to make more and more.
Is it challenging to learn how to use a Cricut Explore 3?
One of the things that drew me to Cricut crafting machines in the first place is how easy and user-friendly they are even for beginner crafters. The Explore 3 continues this high standard for Cricut machines. When you first get your Cricut Explore 3 you will find that it comes with some test materials to use in some predesigned test projects which will get you familiar with how your Explore 3 works with various materials as well as how to use Cricut Design Space (their design software).

There is sometimes a learning curve for working with various materials. I actually enjoy experimenting with materials. If you are nervous doing so yourself you can find many step-by-step Cricut DIY tutorials walking you through using your new machine to make amazing projects. I have several here on my blog you can enjoy. Which leads me to the next commonly asked question:
What kind of projects can I create with my Cricut?
I have sort of touched bases on this already in this article. The Cricut Explore 3 can work with over a hundred different crafting materials making it the perfect tool to utilize in making thousands of different projects.

While I haven't yet posted any DIY projects specifically tailored for the Explore 3 on my site, all the projects I've created with my Explore and Explore 2 are fully compatible with the Explore 3. Similarly, many of the DIY projects I've crafted with my Maker and Maker 3 are also compatible with the Explore 3, provided they don't rely on the Maker's adaptive tools. Check out my Cricut content here.
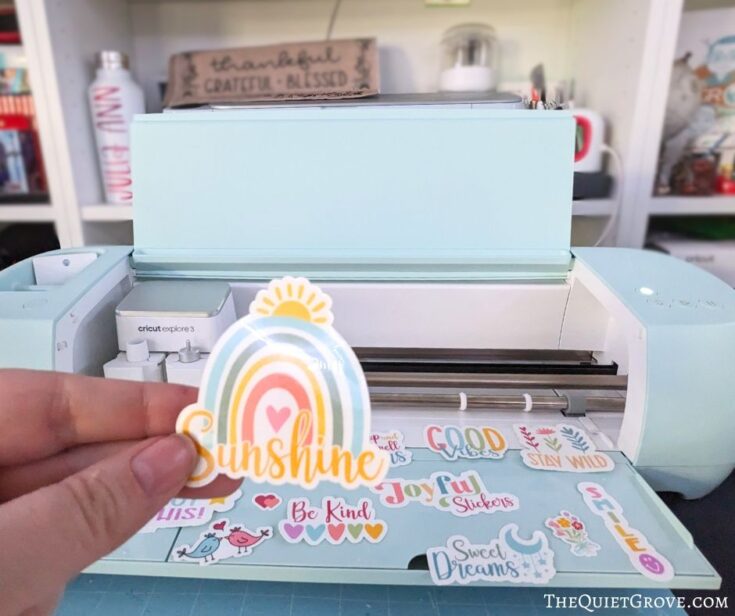
However, I'm excited to fulfill my promise by sharing a DIY tutorial with you, marking my first one here on Thequietgrove.com, exclusively designed for the Explore 3. I thought it'd be enjoyable to demonstrate how to craft your own Waterproof Stickers, considering their current popularity and the ease with which they can be created using Cricut's Waterproof Sticker sets.
DIY Waterproof Stickers with Cricut Explore 3
Materials
Tools
Instructions
Open Cricut Design Space Canvas HERE

Make sure the selected machine is Explore 3 and Click to Make

Send the Design to your Printer

Place Printed Sticker Paper on the Light Grip Mat, & Peel off the end strip on the Laminate Backing

Line up over your printed sheet and carefully apply using the scraping tool from the essential tool kit

Load into your Machine and Select Cricut Waterproof Sticker material from the materials list.

Cut out stickers with Cricut then remove cut stickers from the mat

Each sticker will be individually cut out and ready to use!

Notes
*I created these sticker designs using design assets found in Cricut Access. If you have a Cricut Access subscription (you get 30 days free with the purchase of a new machine) then you can use the sticker designs found on my Design Space canvas for free. However, if you don’t have Cricut Access it will cost you to make these exact stickers for you would have to purchase each design element.
**If you haven’t done a print and cut project using your Explore 3 yet you will be prompted to do a full print-and cut calibration first. It's a simple process that you will be walked through. You will need a standard sheet of paper to do this.
Recommended Products
As an Amazon Associate and member of other affiliate programs, I earn from qualifying purchases.
-
 Cricut Waterproof Sticker Set - 6 Sheets for Durable & Vibrant Decals
 -
Cricut Explore 3 - Cutting Machine
-
Epson EcoTank ET-2800 Wireless Color All-in-One Cartridge-Free Supertank Printer with Scan and Copy – The Ideal Basic Home Printer - Black, Medium
-
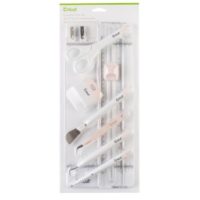
Essential Tool Kit
-
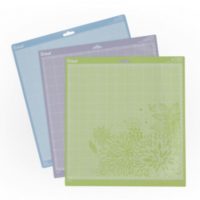
Cricut Mats
-
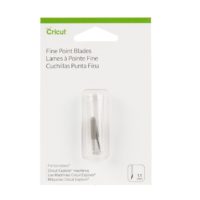
FIne Point Blade


I'm thrilled with the outcome of these stickers and how effortlessly they came together using designs available in Cricut Access. Although having a subscription to Cricut Access isn't necessary to use your Explore 3 (you can create your own designs or upload pre-made designs from bloggers like myself), I must say, leveraging the thousands of designs, elements, and fonts in Cricut Access truly simplifies the crafting process.

Despite being a graphic designer and frequently using my own designs for Cricut projects, I also rely heavily on Cricut Access for inspiration. Recently, I wanted to create a stackable mug set and stumbled upon the perfect design—a set of four mugs with playful nicknames "the smart one," "the quiet one," "the loud one," and "the crazy one". With the complete design readily available, I simply clicked to make, cut out the designs from Cricut's Infusible Ink Sheets, weeded the cut designs, and then transferred them onto the mugs using Cricut's Mugpress. It was such a swift and straightforward project, and my kids absolutely adored them. They instantly recognized which mug belonged to each of them.
If you're unsure about how much you'll utilize Cricut Access and if it's worth the investment, I suggest taking advantage of the trial period. With the purchase of your Explore 3, you'll receive a complimentary 30-day trial. Additionally, subscribing to Cricut Access offers several other fantastic perks.

I hope you found this DIY tutorial on creating waterproof stickers both enjoyable and informative. Stay tuned, as I'll be sharing more Explore 3 DIY step-by-step tutorials soon. If you have any specific project requests for the Explore 3, please let me know in the comments, and I'll be happy to create one for you.
Before wrapping up, let's address some common questions about the Explore 3:

What does the Explore 3 machine come with?
- The Explore 3 Machine
- The Power Cord
- A USB connection Cord (to hook up your machine to your computer)
- Quick Start Guide
- Safety document
- Warranty document
- Fine Point Blade
- Materials (Smart Vinyl, Smart Iron-on, Adhesive Cardstock & transfer tape) to use in introductory projects.)
- 100 free predesigned projects in Cricut Design Space
Do I need to pay for a Subscription to use the Explore 3?
No, You don’t have to pay for a subscription to use your machine. Cricut Design Sapce Software is free to use. However, Cricut Access Subscription is amazing and well worth the cost.
What is the difference between the Explore 2 and the Explore 3?
The Explore 3 can do everything the Explore 2 can, additionally, it can cut 2x faster than the Explore 2 and it has special sensors that allow it to do matless cutting with smart materials.
Do you need cutting mats to use the Explore 3?
Yes and No. It depends on what material you are cutting. Smart materials that are compatible with the Explore 3 and Maker 3 do not require a mat, however, all other materials (like paper, cardstock, faux leather, sticker paper, infusible ink, standard vinyl & Iron-on, etc all require a mat to cut.
Note* The Explore 3 does not come with any mats so if you want to work with materials that need a mat you will have to purchase them separately.
Can you connect your Explore 3 with Bluetooth or do you need a cord?
The Explore 3 is Bluetooth compatible which is how you would connect with your tablet or smartphone. However, it does come with a USB connecting cord. Laptops and desktops can connect either way.
Do I have to have the internet to use Cricut Design Space?
To initially download Cricut Design Space you will need an Internet Connection, but after that, you do have the option to work offline anytime you choose.
Is the Cricut Explore 3 Worth it?
Yes, Yes it is. You will love your Cricut Explore 3 crafting machine. I know I do!

Do you have any other questions about the Cricut Explore 3 that I haven’t answered in this article? Let me know in the comments and I will be sure to answer them.

Did you like this article? Then check out these: (Click on the photo to go to the post)