DIY Customized North Pole Mail Bags


Add a bit of Magic to your Christmas this year by making these customized North Pole Mail Bags.

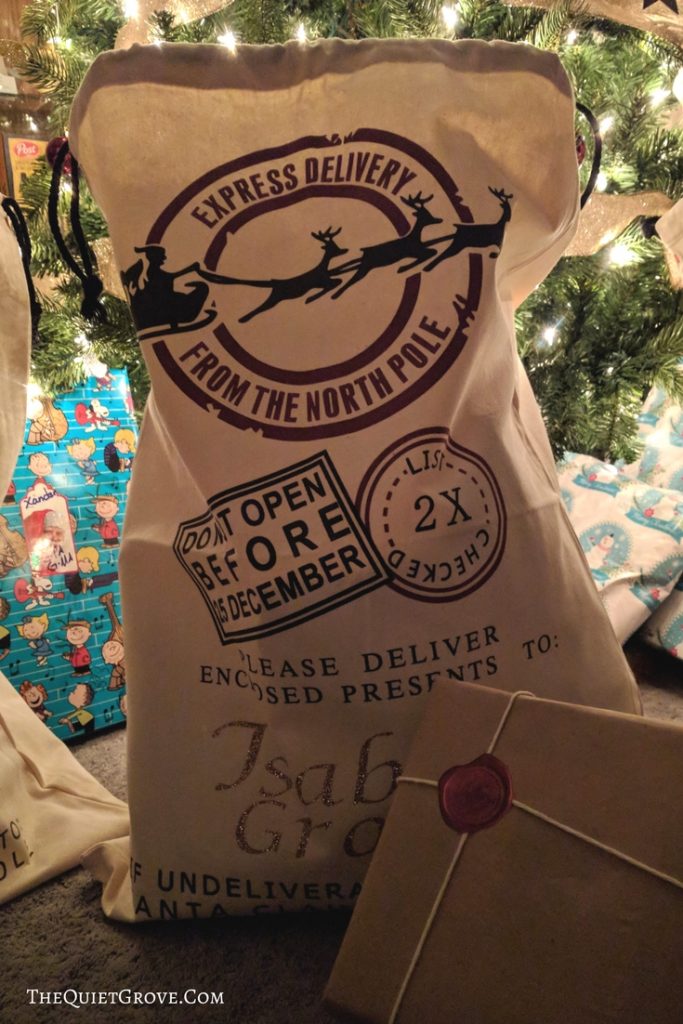
Have you ever heard of North Pole Mail Bags? There are a lot of different designs available online. This one is my favorite. When I first saw them I thought they would be perfect to send gifts to loved one in. Imagine them opening their package in the mail to find that all their gifts are in one of these fun mailbags that they then place under their Christmas tree to wait to open on Christmas day. These bags would also be great for delivering Secret Santa gifts in.
 My husband and I decided to get one for each child to put their presents from Santa in. Usually, we pick a different colored wrapping paper for each kid. Then on Christmas morning, we let each kid know which paper is theirs.
Like I said this year we decided to do things a bit differently. Since we were going with a Harry Potter theme for Christmas this year, all our gifts were wrapped in brown paper and string (with a Hogwarts wax seal sticker) Since all the gifts were wrapped the same we put each child's gifts in their custom bag from the North Pole. That way they could tell which gifts were theirs.

Thanks to my Cricut Explore Air 2 and Cricut Iron-on it only took a few minutes to customize all the bags.
Materials:
- Cricut Explore Air 2
- Cricut Design Space
- Fine Point Blade
- Gold Glitter Iron-on
- Strong Grip Cutting Mat
- Iron On Protective Sheet
- Cricut Essentials Tool Kit
- Iron
- The North Pole Mail Bag
Instructions.
- In Cricut Design Space select Text and type in the name you want to customize your bag with.
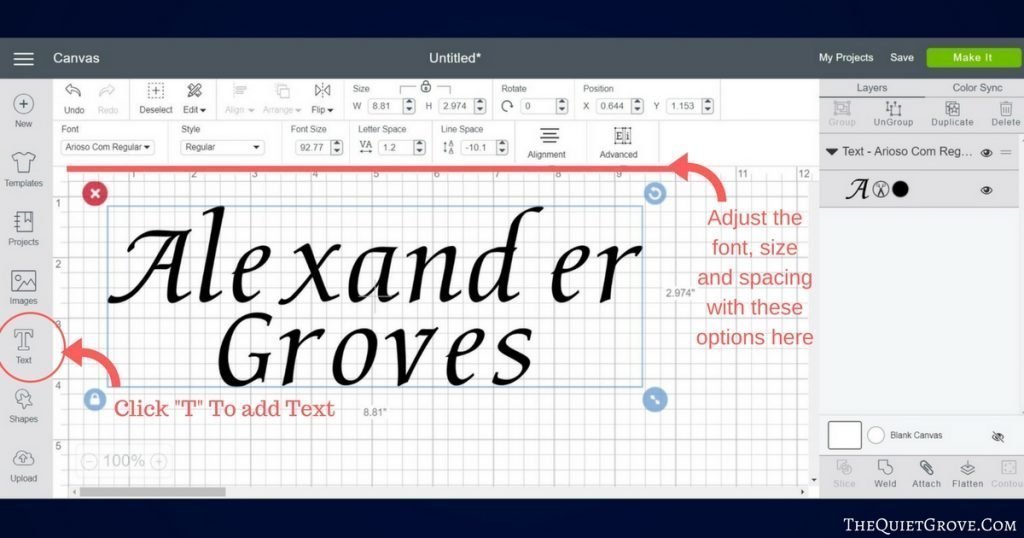
- Select your desired font and size to fit in the open space on the front of your bag
- Click the Make it button and
- Make sure to select the Mirror Image box
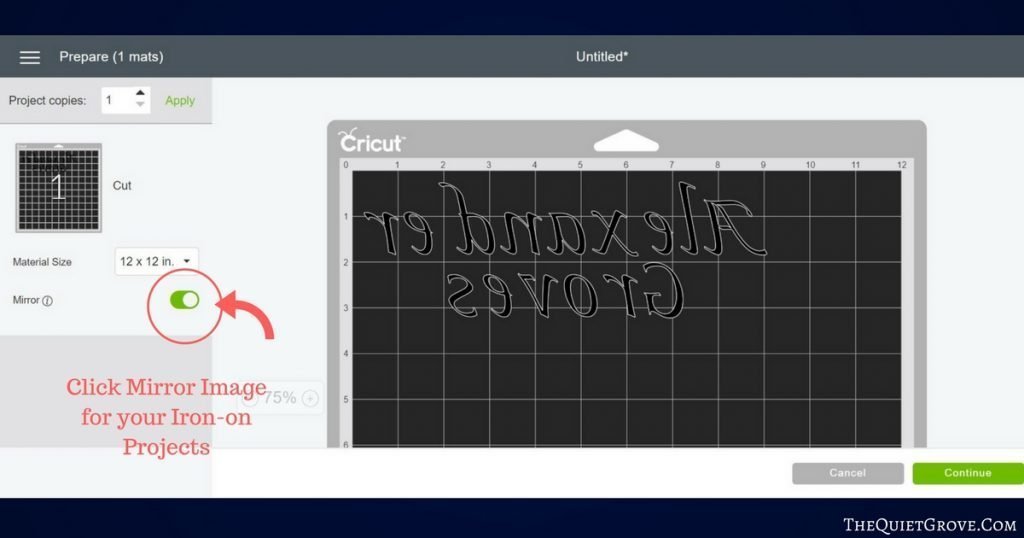
- Set your Cricut dial to Custom and select the Glitter Iron-On option from the custom material list on Design Space.

- Load your Glitter Iron-on onto a Strong Grip mat with the shiny side down.
- Load your mat and then click the flashing Cricut button to start cutting.
- Once done cutting carefully weed your design using your weeding tool in the Essential toolkit.
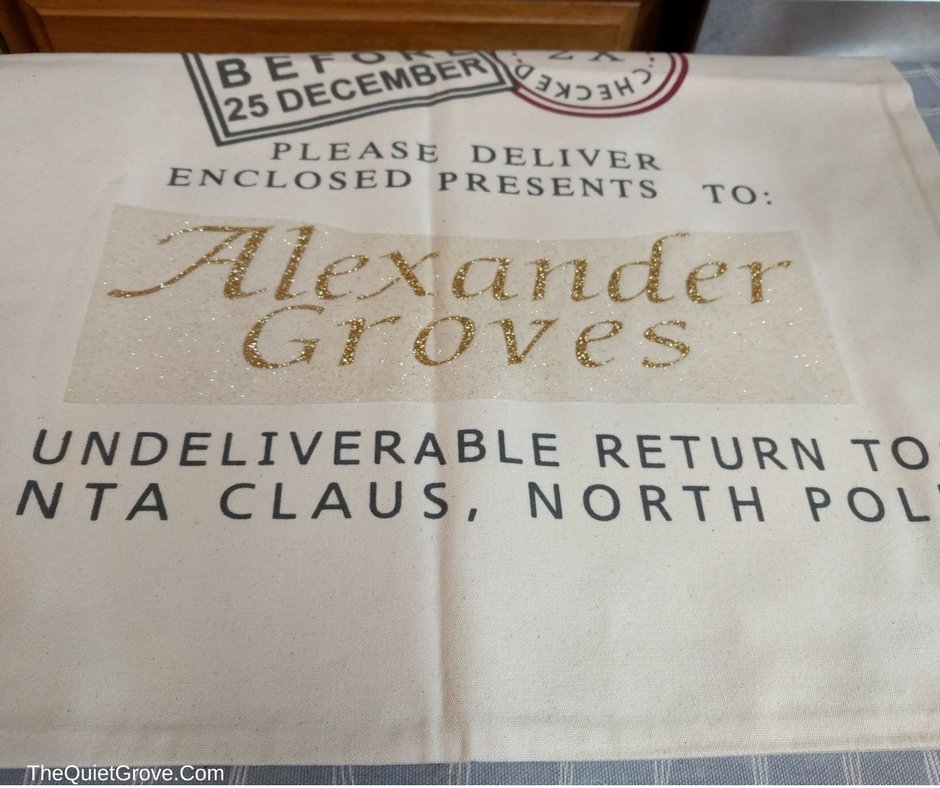
- Set your Iron to as hot as it will go and heat up the canvas surface where you plan to add the Iron on.
- Carefully place the Iron-on on the bag making sure the letters are straight.
- Place the Iron On Protective Sheet over the Iron-on and then press the Iron firmly over the Protective Sheet.

- After Pressing firmly with your Iron for a few minutes check to see if the Iron on is fused to the bag. (you know you are done with the clear backing easily peels off leaving the design behind. If the design is lifting at all when you try to peel the backing off then put it back down and press the Iron down for a few more minutes.

We loved how the bags worked out soo much that after Christmas we packed them away with our Christmas decorations to use next year. Since the Gold Glitter matches my normal Christmas decor.
If you liked this post then check out these: (Click on the photo to go to the post)