This adorable window box is the perfect gift box for chocolate covered berries.

Recently I went to a mom unbirthday event (put on by the Utah Mom Tribe) along with my younger sister. The idea behind this event was that as mothers our birthdays are overlooked unless we step up and do something about it. So they decided to throw a fun UnBirthday party for local moms.

For this event both my sister and I agreed to bring 6 gifts to exchange with other moms. The idea being that everyone who came would get a gift. My sister used her Cricut to make some adorable Harry Potter mugs (with the hogwarts crest using perminant vinyl). She teamed these mugs up with my Harry Potter Bookmarks, a chocolate frog and some candy in the house colors.

I decided to make some dark chocolate covered berries (a favorite treat of mine that is acutally healthy. You can even eat it if you are on the keto diet…) I wanted their packaging to look as beautiful as the treat is yummy so I used my cricut to cut out custom boxes and lables. Follow the tutorial below to make them right away or save them to a Pinterest board for Cricut DIY tutorials to make them later!

DIY Chocolate Berries Gift Box

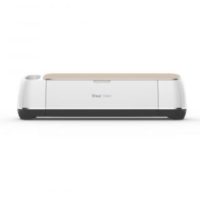
DIY Chocolate Berries gift boxes made from Kraft Board and foil Acetate (and cardstock) using a Cricut Maker.
Materials
- White Kraft Board
- Foil Acetate
- Dark Blue Cardstock
- Chocolate Covered Strawberries & Raspberries
- Pink Foil Iron-on
Tools
Instructions
Cutting Instructions:
Open Cricut Design Space for Chocolate Berrie Boxes -->HERE

Click to Make it and select make sure to mirror Image the Iron-on (pink) mat.

Kraft Board as the Material & Place the Scoring Wheel into the tool slot (your Cricut will always score first then cut second).
Load Kraft Board onto Standard Grip Mat and load into Cricut to score & cut.

After scoring switch scoring wheel for the Deep Cut Blade.
After cutting, peel the mat from the cut design.

--> Repeat for all Kraft Board Mats
Next, change the material to Foil Acetate.
Peel off the protective backing from Acetate and place foil side up on Standard Grip Mat.
After cutting, peel the mat from the cut design.
Change the material to Foil Iron-on & Place the Iron-on shiny (colored) side down on the standard grip mat.

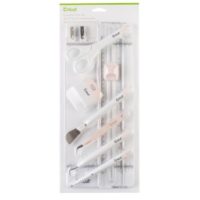
After cutting, use the weeding tool from the essential tool kit to weed excess Iron-on from the cut design.

Change material to Cardstock for Intricate Cuts & Place Cardstock on Standard Grip Mat.

After cutting, peel the mat from the cut design.

Ironing Instructions:
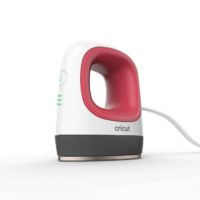
Heat Easypress Mini to the lowest setting (if using 6x7 Easypress 2 set to 270°)
Preheat the material for 5 seconds & place the Iron-on design onto the cardstock

Press for 30 seconds.

Let cool then peel.

Assembly Instructions:
Fold Kraft Board along all the scored lines.

Glue the sides of the box & box lid in place (first glue the bottom tabs then add glue to the inside of the upper tabs and fold inside the box.)

-->Repeate for the Lid
Glue the Acetate window into the inside of the box window.

Glue decorative wrap layers together.

Fill with freshly made Chocolate Covered Strawberries and Raspberries in white cupcake tins.

Tape wrapping to box to seal.

Recommended Products
As an Amazon Associate and member of other affiliate programs, I earn from qualifying purchases.
I really loved how these Chocolate berry gift boxes turned out. Each box was big enough to hold 3 large chocolate covered strawberries along with 9 chocolate covered raspberries. If you are looking for a great gift to make/give to someone special in your life you can’t go wrong with a box of chocolate covered berries!

If you liked this post then check out these: (click on the photo to go to the link) 
