Are your kids excited for Disney’s Frozen II to coming out this week?

Disney’s Frozen 2 just hit theaters nationwide and I have to admit that after seeing the trailers I am as excited to see the movie as my kids are. I remember how for months after the original Frozen came out my daughter would dance around the house dressed as Elsa singing Let it go.She even went as Elsa for Halloween and convinced her younger brothers (then 2 1/2 & 4 months) to go as Kristoph and Sven. They were all soo adorable. Now years later I am ready for them to become just as obsessed with their beloved Frozen Characters.

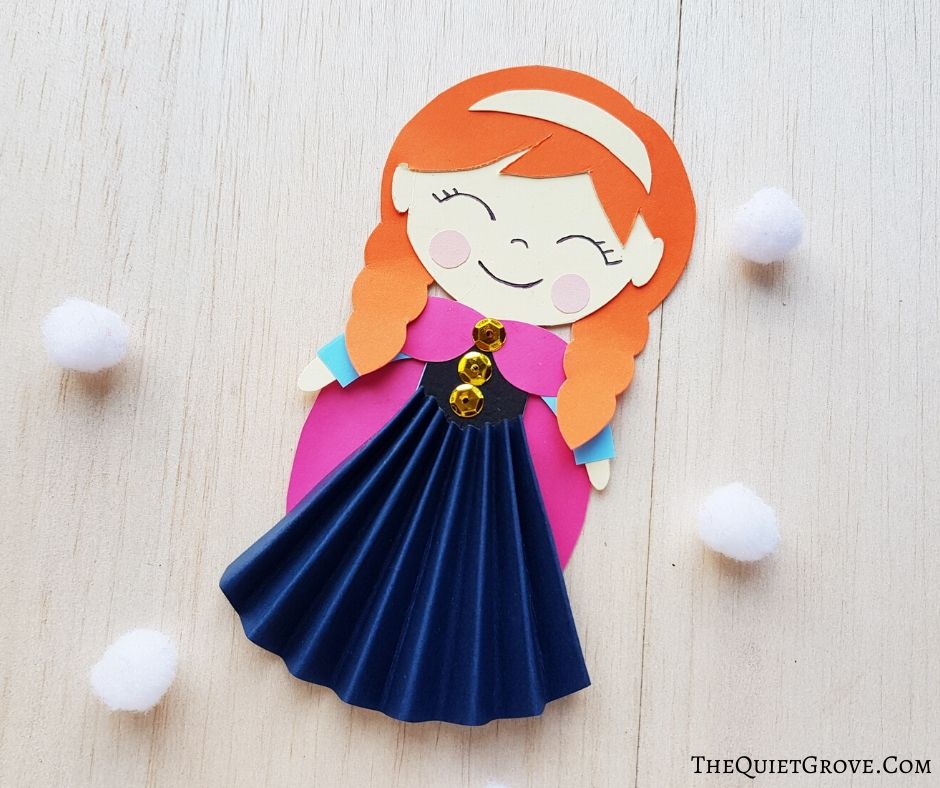
To celebrate I wanted to share this fun Princess Anna Paper Doll Craft tutorial (with free printable template) that you can make with your kids! Make it now following the instructions below or pin it to your Disney Pinterest Board to Make later.

Frozen Inspired Princess Anna Paper Doll

Celebrate the release of Disney's Frozen 2 by doing this fun Ann paper doll craft with your kids.
Materials
- Colored craft papers
- Sequins
Tools
- Anna Paper Doll Template
- Pencil
- Pen
- Scissors
- Craft glue
Instructions
Step - 1:
Select colored craft papers for the paper Anna doll. I'm using orange-colored craft paper for the hair, baby blue for the top, navy blue for the skirt, pink for the cape, black for the vest and cream-colored craft paper for the body. Trace the patterns from the provided template (which you can get here) on the selected craft papers. Cut out the traced patterns nicely.

Step - 2:
Take the hair cut out and trace the red pattern marked on the hair pattern template on the hair cutout. Cut a slit along with the pattern, making sure to keep the hair cutout intact on both sides of the slit.

Step - 3:
Grab the body cut out and slide the top end of the head through the slit from the bottom side of the hair. The bottom side of the hair should remain on the backside and the top side of the hair should be placed on the front of the head part. Attach the headband cut out from paper on the hair.

Step - 4:
Grab all the clothe cutouts! It’s time to dress up Anna.

Step - 5:
Attach the top parts of the dress first. Attach the long-sleeved top first and then attach the vest on top of it.

Step - 6:
Attach the arch-shaped cutout (cape) on the backside of the Anna paper doll; keeping the straight end on the bottom side. Attach the 2 semi-circular paper cutouts on both shoulders; these are the front parts of the cape.

Step - 7:
Take the skirt cut out and create accordion folds on it. Adjust the width of the top (smaller side) side of the accordion folded paper to the width of the Anna paper doll's waste.

Step - 8:
Attach the accordion folded pattern on the paper Anna doll.

Step - 9:
Use a black pen to trace the eyes, nose, and lips of Anna and attach pink circles for cheeks.

Step - 10:
Add Sequins on the bodice of the gown and any other items for decoration you want.

I hope you enjoyed this fun little Disney themed paper crafting tutorial. I love that you can make it with basic crafting materials you have at home. You can make your princess Anna paper dolls to play with at home or even take with you to the theater.

If you liked this post then check out these: (click on the photo to go to the post)


Maria
Tuesday 10th of September 2024
I want this
Rozina Sultana
Tuesday 16th of May 2023
I need this .